Image Uploading
Operation Steps
-
Upload the image to US3. Because the image usually has a large capacity, you need to use a client side or SDK to upload. View instructions
Note: Please add the image to the public storage space. -
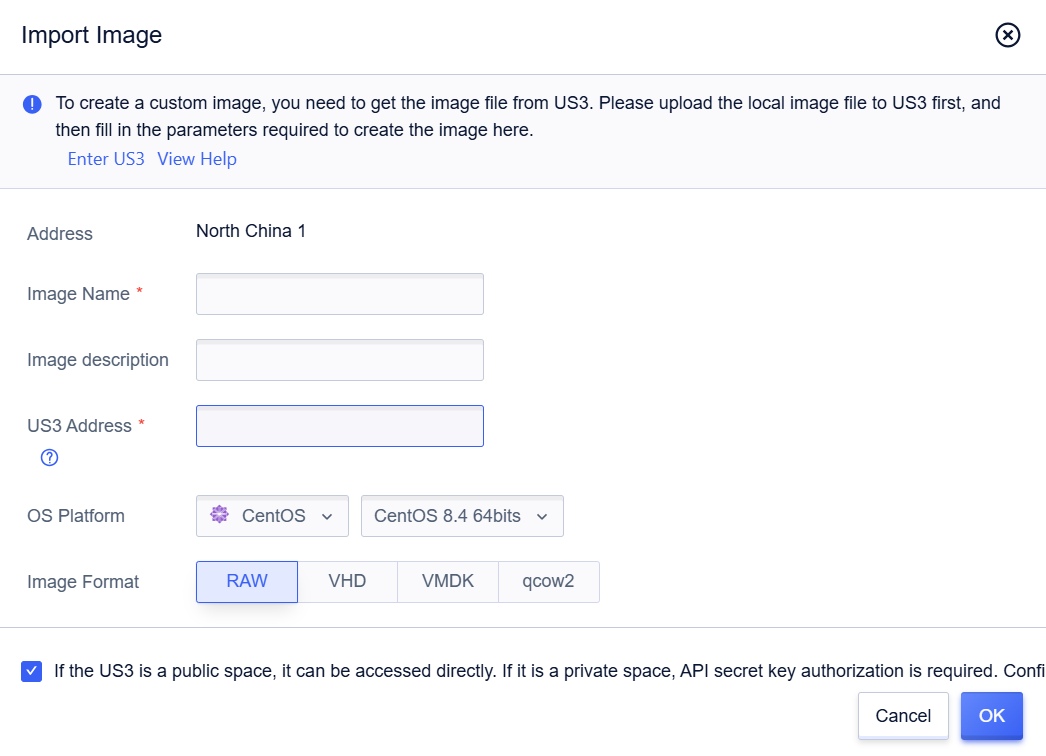
Please select Console ->【UHost】->【Image Management】, click【Import Image】
-
Enter relevant image information. Choose “Confirm” to start importing.
-
The import progress can be checked in the image list. You can create a host once the image status becomes “Available”.
Note: Some regions temporarily do not support image uploading. If you wish to upload to such regions, please first upload the image in North China One. After completion, submit a ticket to migrate the image to the target region.
Operation Notice
Linux Image
Systems: Images based on CentOS, Redhat, Ubuntu, OpenSUSE, and SUSE distributions. Support 32-bit and 64-bit.
Supported Image Formats: raw, vhd, qcow2, vmdk
File System Types: ext3 or ext4 file system using MBR partitions (GPT partitions are not supported)
System Disk Size: Recommended not to exceed 50G
Driver: Must install virtio driver for the virtualization platform KVM
Kernel Limitation: It is recommended to use the native kernel. If the kernel is modified, it may cause import failure. If the image is Redhat, the user needs to purchase the license himself.
Other Limitations: Only system disk image is supported, and data disk is not supported.
Windows Image
Operating systems: Microsoft Windows Server 2008/2012; supports 32-bit/64-bit system, supports activation
Supported Image Formats: raw, vhd, qcow2, vmdk
File System Types: NTFS file system using MBR partitions (GPT partitions are not supported)
System Disk Size: Recommended not to exceed 50G.
Driver: If the image carries the virtio driver, it will start with virtio. If the image does not carry this driver, it will start with IDE.
Other Limitations: Only system disk image is supported, while data disk is not supported.
Other Images
When your image is not within the range of images supported by Surfercloud, you can choose to upload it as an “other” type of image.

Other images have the following limitations:
- By default, no initialization is included. Therefore, the initialization steps such as password setting, network setting, SSH installation, NTP configuration, Yum source configuration, etc. during the creation/reinstallation of a host will not take effect. Users need to self-configure through the console login function. Please refer to the “Manual Initialization Steps”.
- The password modification function in the console is not taking effect.
Manual initialization steps:
- Before uploading, DHCP must be enabled inside the image to automatically obtain an internal IP.
- Upload the image through the console and create a host through this image.
- Via the console, log into the virtual machine through the UHost login function.
- Set the password.
- Configure NTP and Yum source (optional).
- Install SSH (optional).