Host
Create a Host
If you want to know in detail how to create a host, please refer to the Creating Your First UHost.
Manage a Host
If you log into the uhost console , you can perform login, shut down, restart, and power off operations for the host.
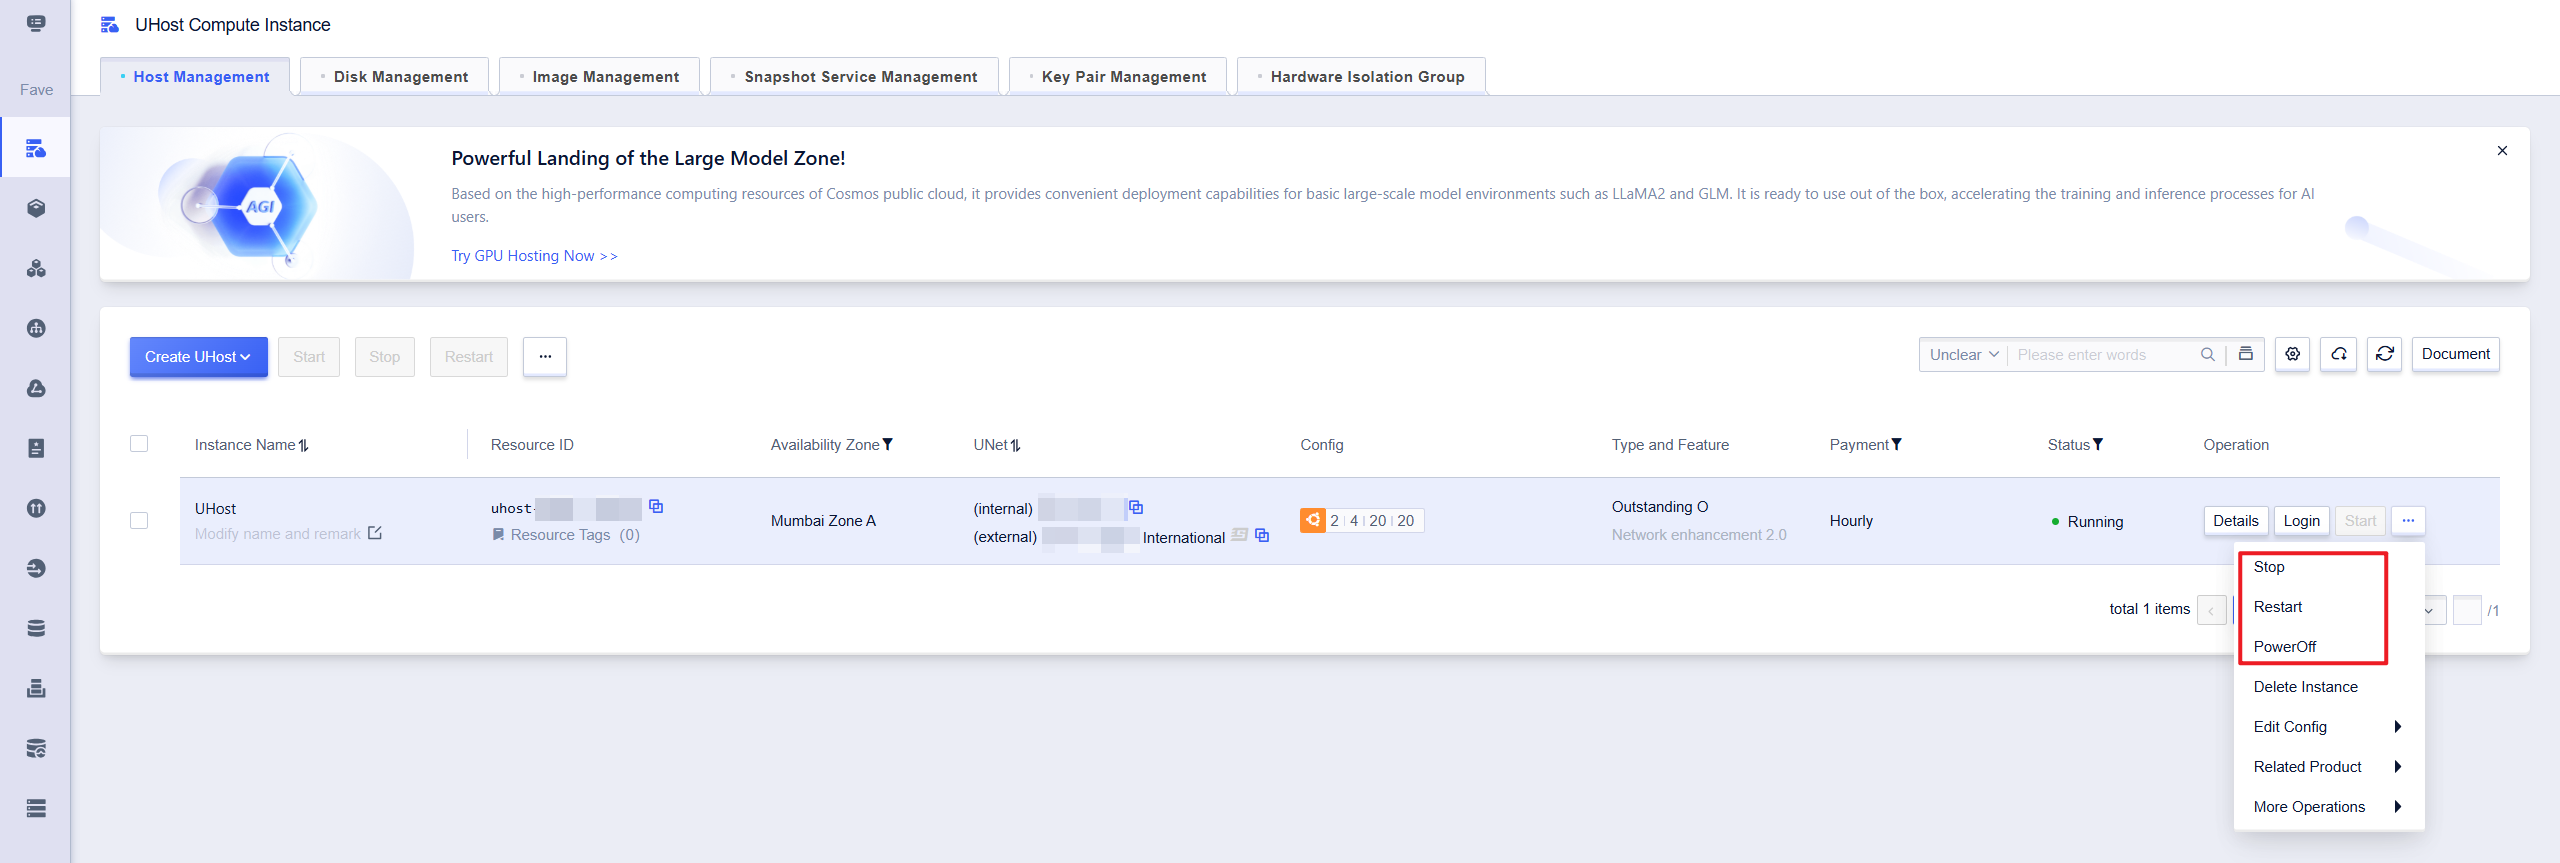
Power-off and reboot are at the virtual machine level. If the restart or shutdown is ineffective, you can use the power-off operation, which is a host-level shutdown, equivalent to forcibly shutting down the power supply, which is more thorough.
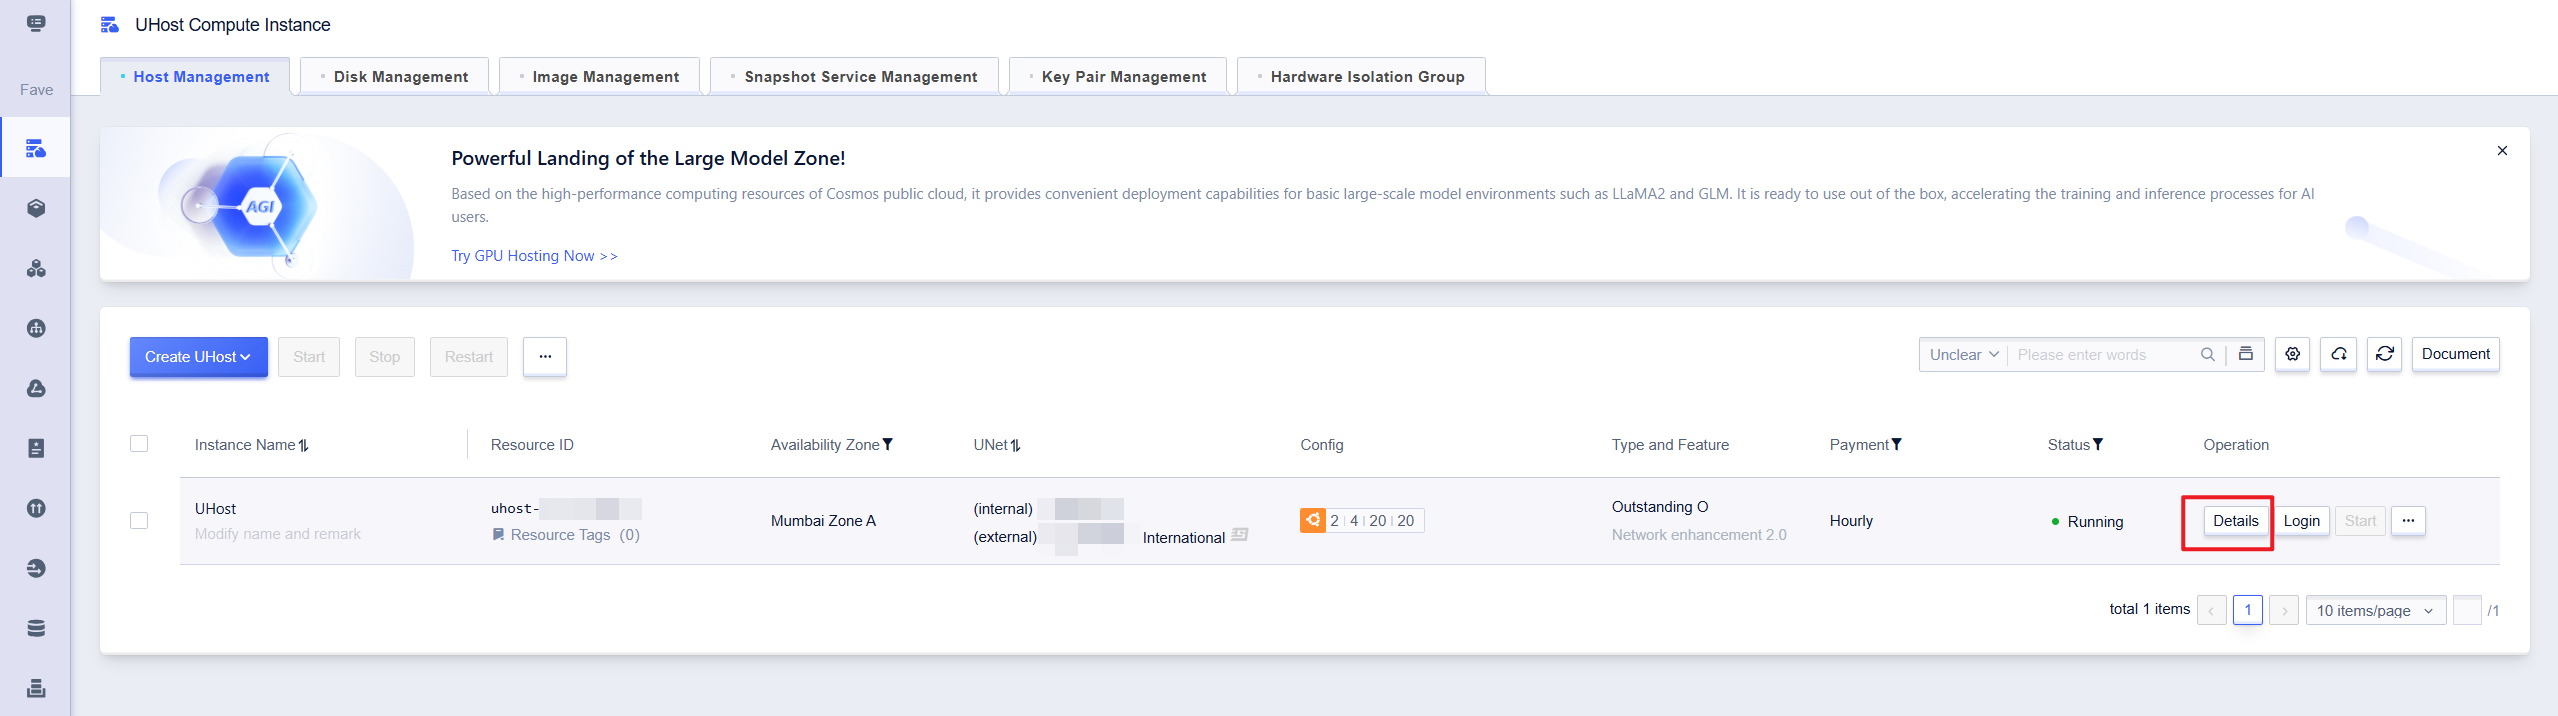
If you click on【Details】, you will enter the host details page, showing the basic information, configuration information, payment information and monitoring related information of the currently selected host.
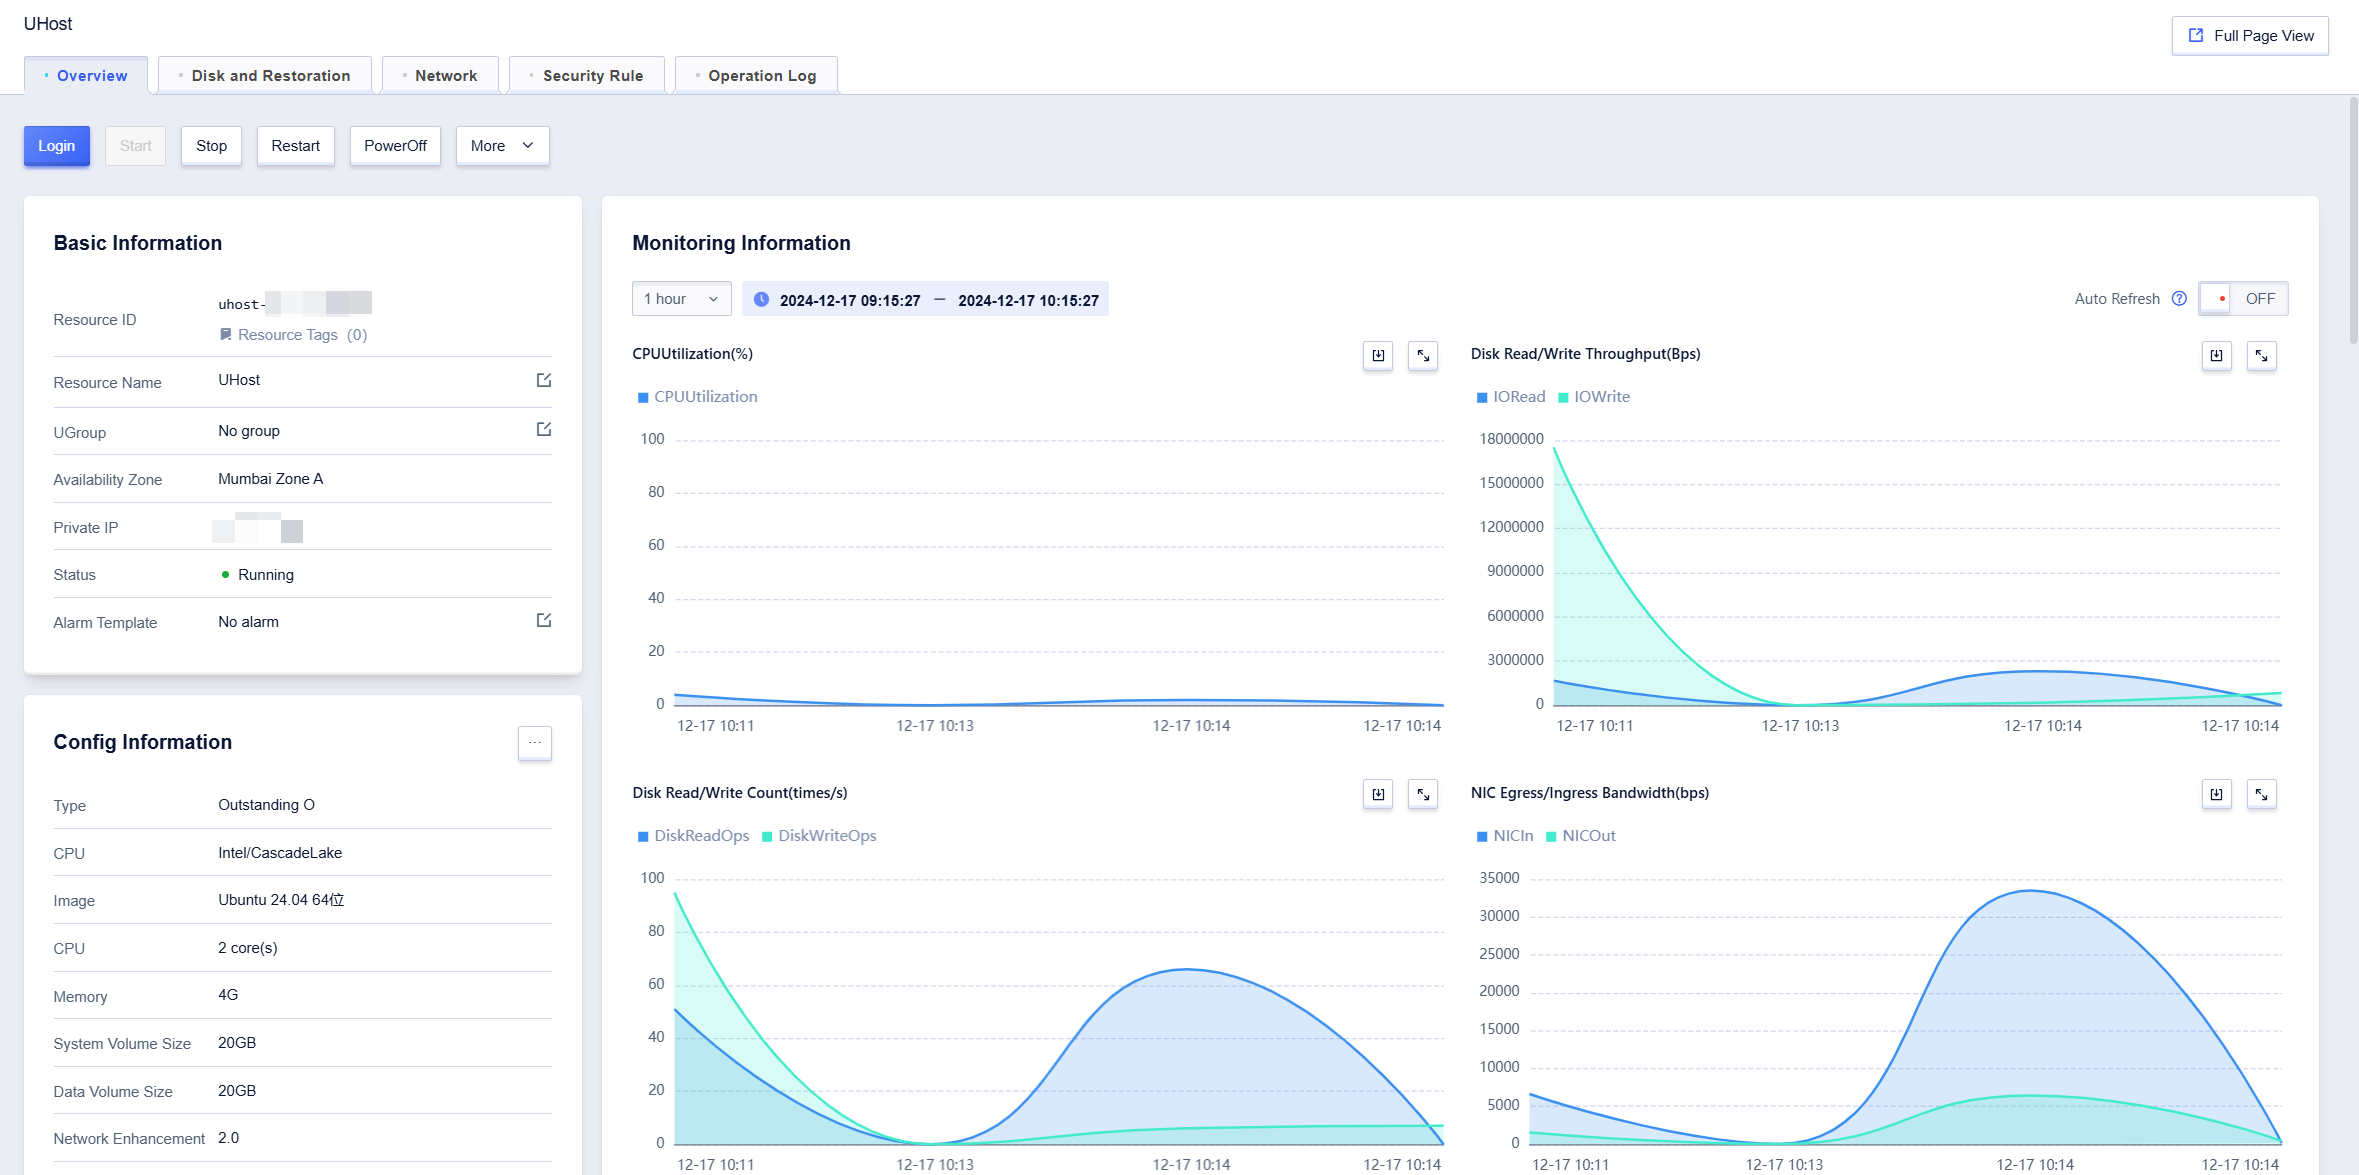
Basic Information Module
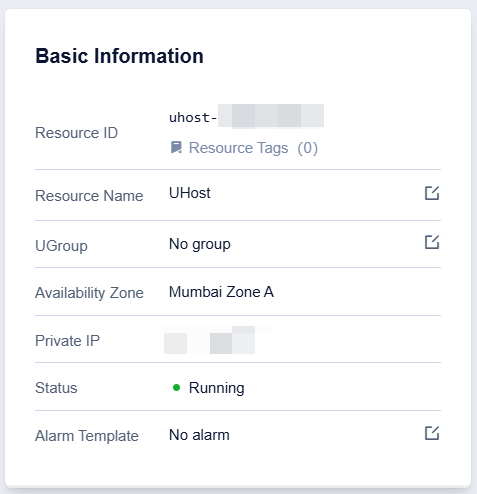
The basic information module includes basic information such as resource ID, resource name, UGroup, availability zone, and private IP. Among them, resource name and UGroup name can be changed instantly.
Configuration Information Module
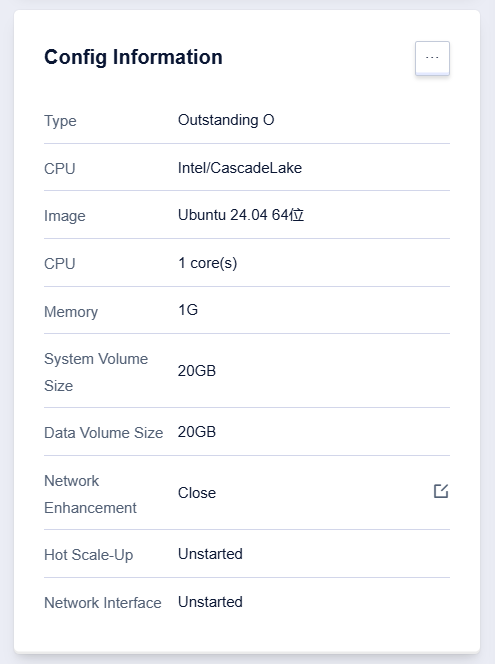
The configuration information module contains host configuration related information such as machine type, CPU platform, CPU and memory. Click 【…】 to enter the configuration change page, which supports changing memory and CPU specifications, adjusting disk capacity, and upgrading the bandwidth of the external network elastic IP.
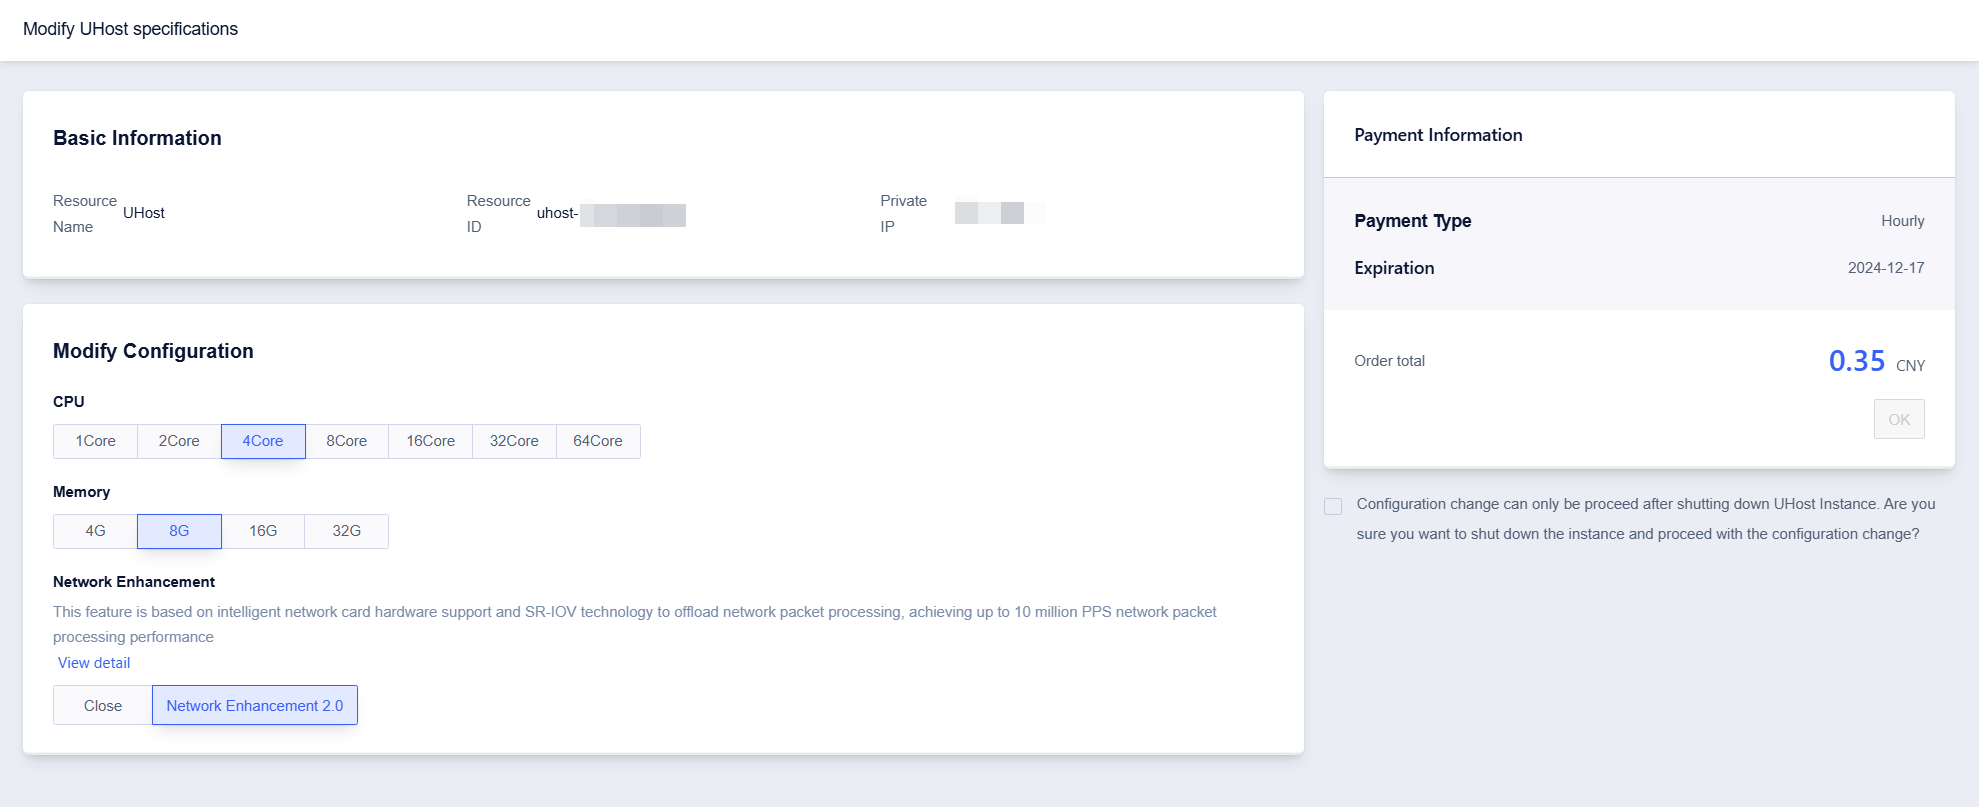
Change Specification
Operation Path
- Select UHost
- Click to select【Edit Config】, then click【Modify UHost specifications】
- Select corresponding CPU and memory upgrade data respectively
- Click【OK】, pay the difference, and complete the payment
Adjust Disk Capacity
Operation Path
- Select UHost
- Click to select【Edit Config】, then click【Expand disk capacity】
- Select the capacity value of the adjusted disk
- Click【OK】, pay the difference, and complete the payment
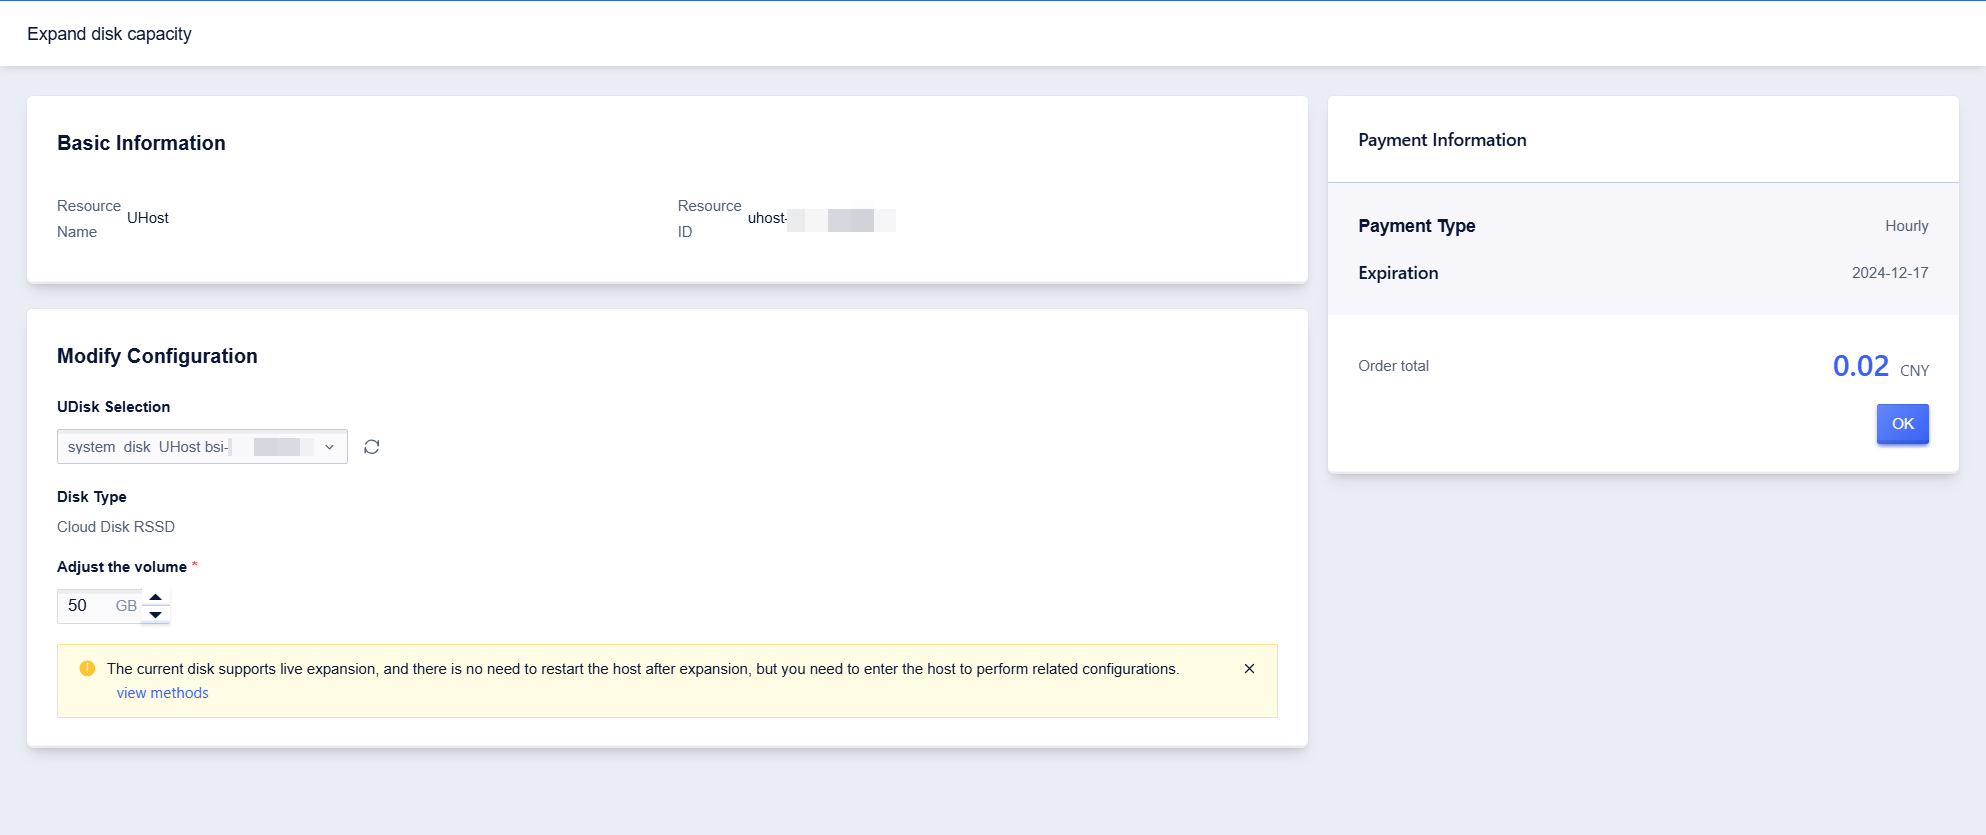
If the current disk supports online expansion, the host does not need to be restarted after expansion, but related configurations need to be done inside the host. For details, please see Disk Configuration.
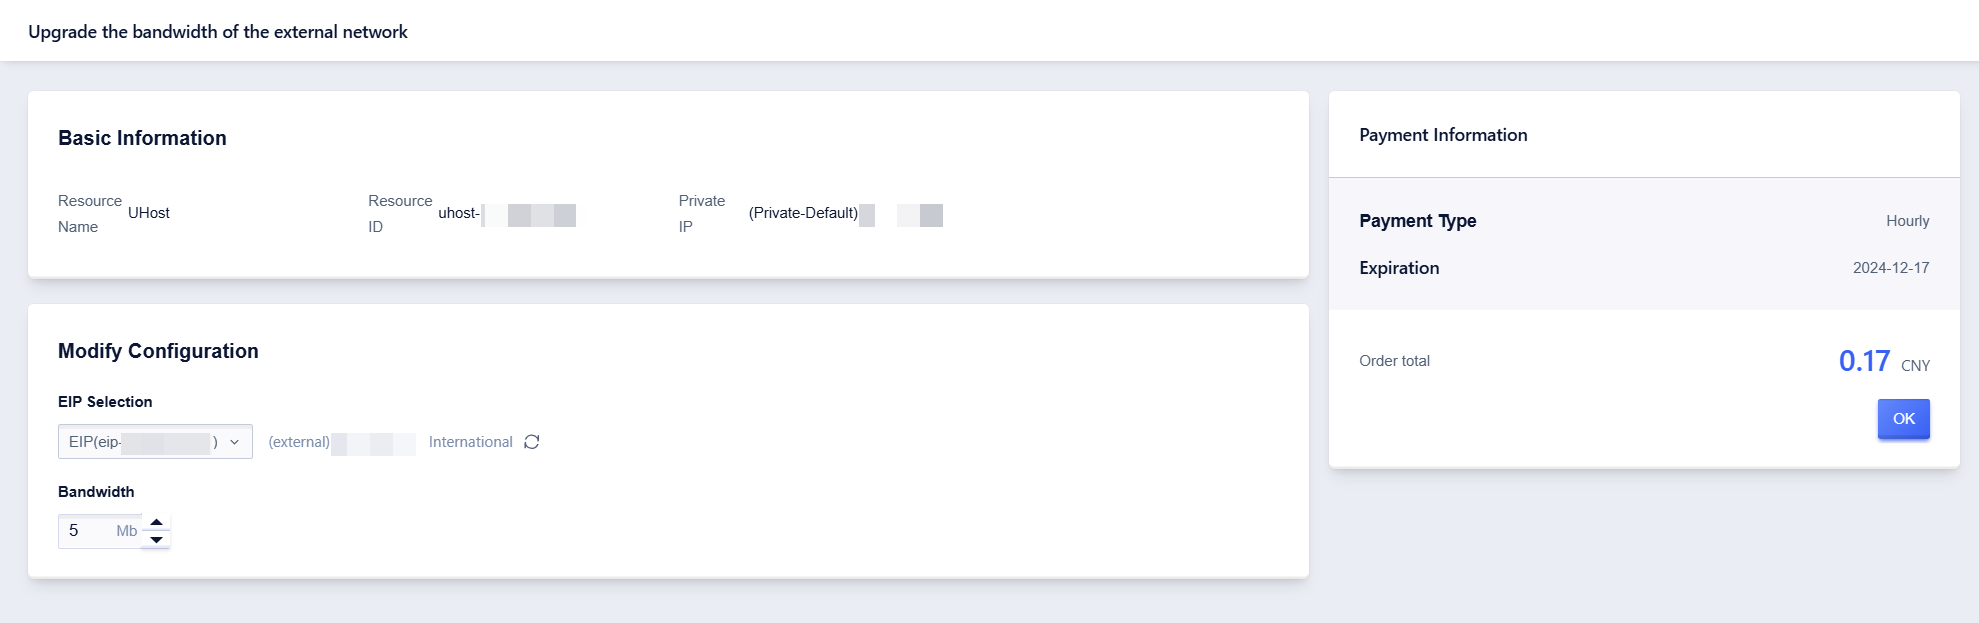
Upgrade Elastic IP Bandwidth of External Network
Operation Path
- Select UHost
- Click to select【Edit Config】, then click【Upgrade EIP】. Select the IP address that needs to be upgraded and click [Continue] to proceed to the next page
- Adjust the bandwidth value you need
- Click【OK】, pay the difference, and complete the payment
Payment Information Module
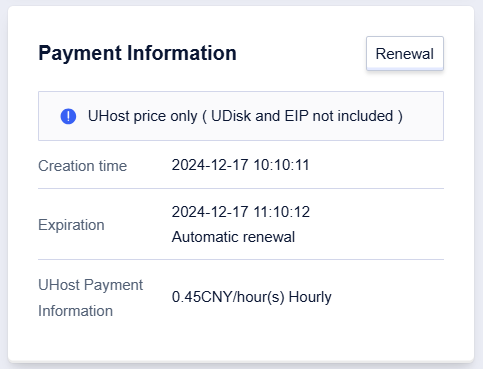
The payment information module includes creation time, expiration time, and payment method, click【Renewal】, to support one-click renewal.
Delete a Host
You can log into the uhost console , select a host, click【Delete UHost】, to delete the current host.
- If you delete a UHost through the console, the EIP and UDisk associated with the host will be deleted synchronously and will not continue to be charged. When using the API, whether to delete EIP and UDisk synchronously is determined by the fields ReleaseEIP and ReleaseUDisk.
- After the resources are deleted, the system will automatically refund the remaining fees in the lease. If you want to know the specific refund rules, please read Refund Details.
Network Configuration
The console host list page provides an entry to change the external network firewall, bind elastic IP, and mount the cloud hard disk.
Operation Path
- Select UHost
- Click【…】, and select【Associated Product Operation】
- Click on【Change External Network Firewall】/【Bind Elastic IP】 operation
Disk Configuration
Operation Path
- Select UHost
- Click【…】, and select【Associated Product Operation】
- Click【Mount Cloud Disk】 operation
If you need to know more about the cloud disk, please read Cloud Disk Operation Guide
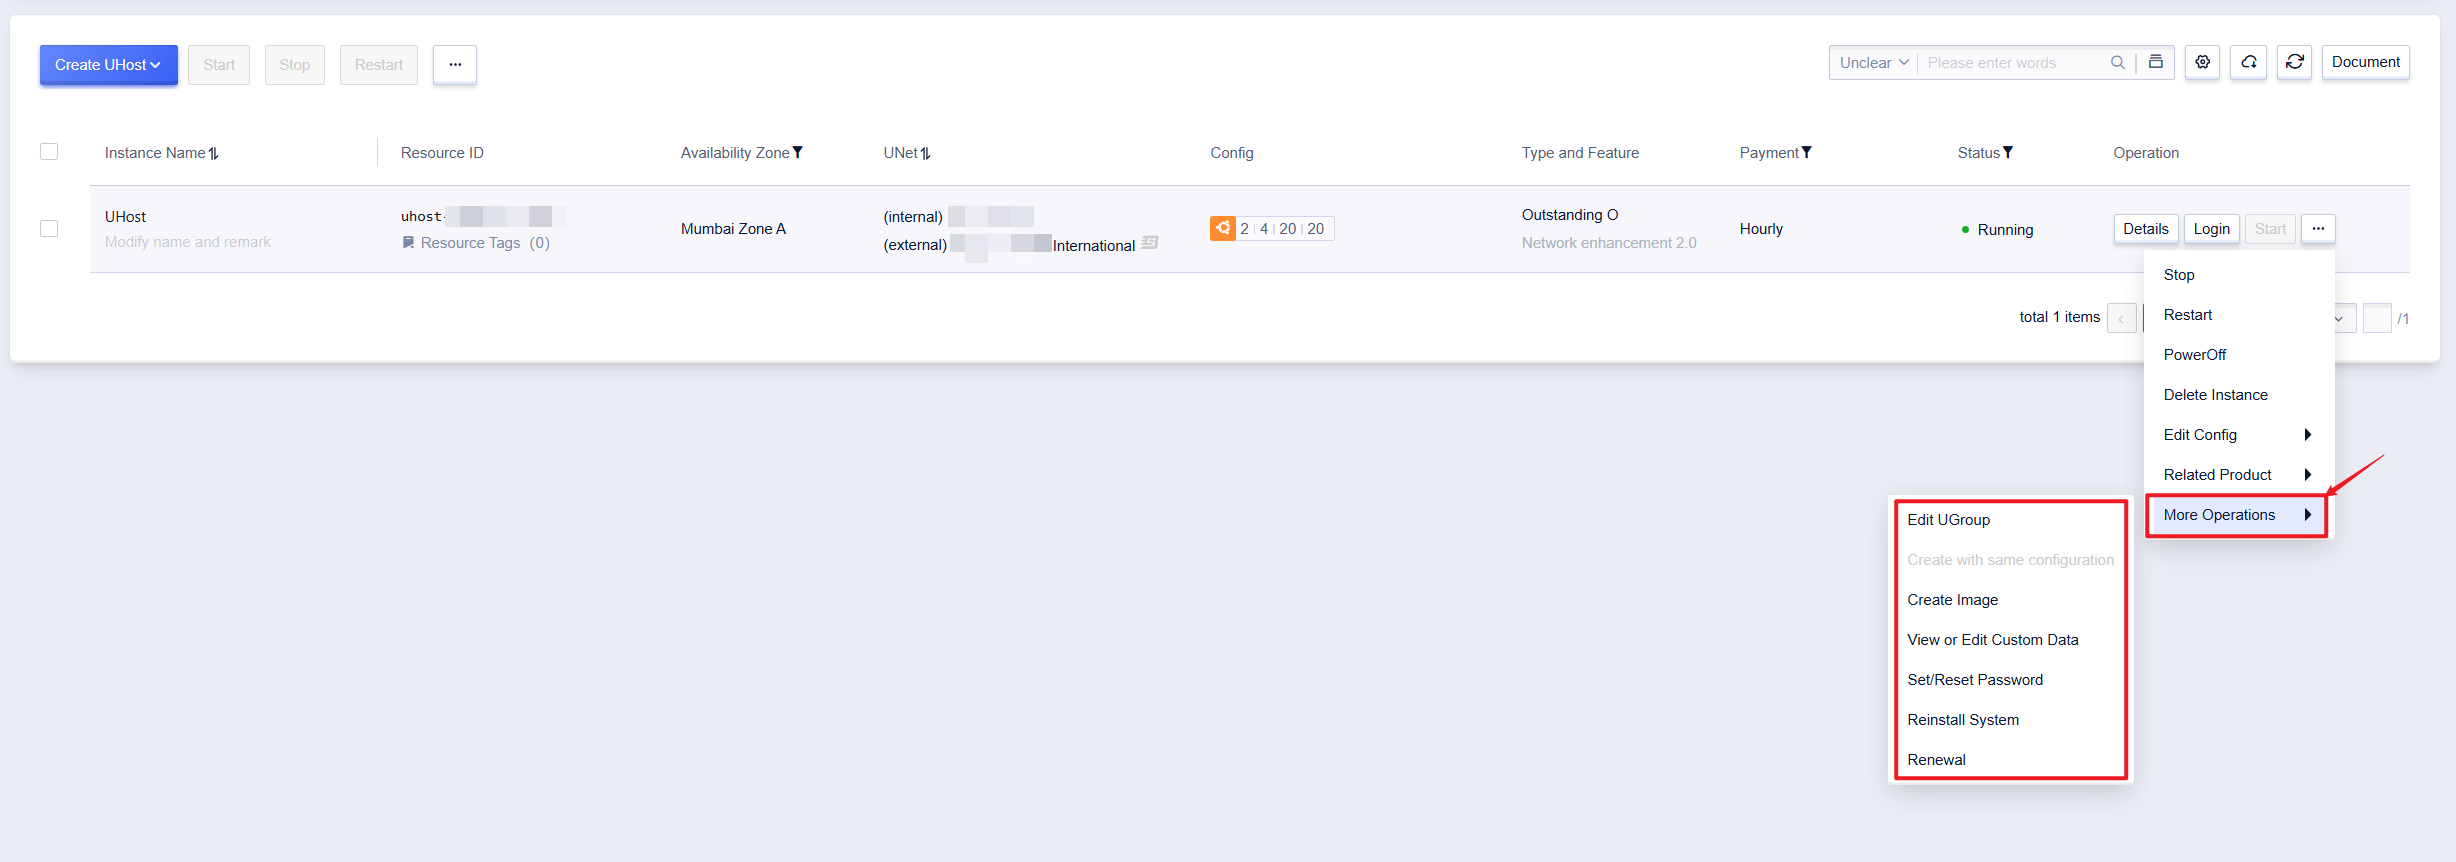
More Operations
In addition to the above functions, the console list also supports changing UGroups, making images, and other more operations.
Edit UGroup
Operation Path
- Select UHost
- Click 【…】, and select 【More Operations】
- Click 【Edit UGroup】
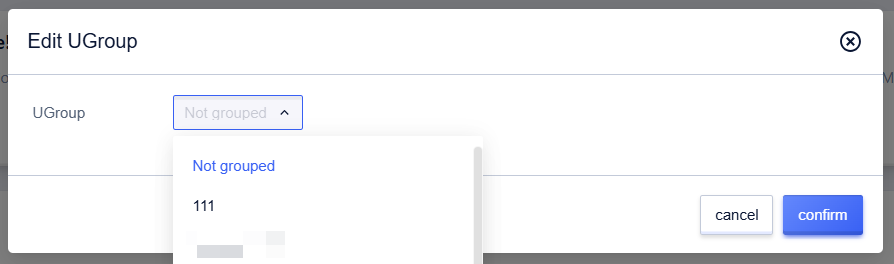
You can group UHosts, so that some operations can be performed in units of UGroups, eliminating the cumbersome operation of one-by-one, convenient for centralized resource management. Subsequent viewing of monitoring data or modifying rules can be performed in groups.
View/Modify Custom Data
Operation Path
- Select UHost
- Click【…】, and select【More Operations】
- Click【View/Modify Custom Data】
If you need to know more about metadata and custom data operations, please read metadata and custom data
Make an Image
Operation Path
- Select UHost
- Click【…】, and select【More Operations】
- Click【Make an Image】
If you need to know more about images operations, please read Image Operation Guide
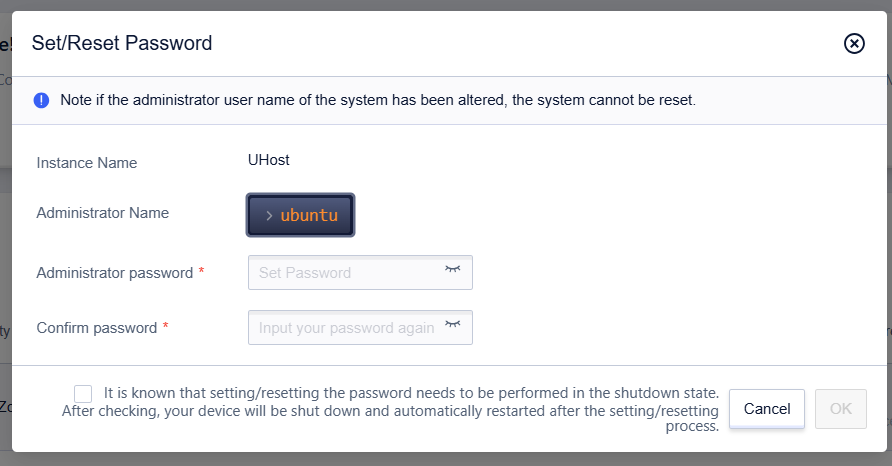
Reset Password
Operation Path
- Select UHost
- Click【…】, and select【More Operations】
- Click【Reset Password】
Meanwhile, you can also use the uhost reset-password (UCloud CLI) command to reset the host password and specify the availability zone and instance ID. Please use the —password parameter to specify the host password as follows. For example:
ucloud uhost reset-password --zone cn-bj2-05 --uhost-id uhost-0a3gcvih --password test12345
The output of the above example is as follows:
uhost[uhost-0a3gcvih] will be stopped, can we do this? (y/n):y
uhost[uhost-0a3gcvih] is shutting down...done
uhost[uhost-0a3gcvih] reset password
- Currently, you still need to shut down to reset the password;
- If you have modified the default account, the reset password may not take effect.
Reinstall the System
Operation Path
- Select UHost
- Click【…】, and select【More Operations】
- Click【Reinstall System】
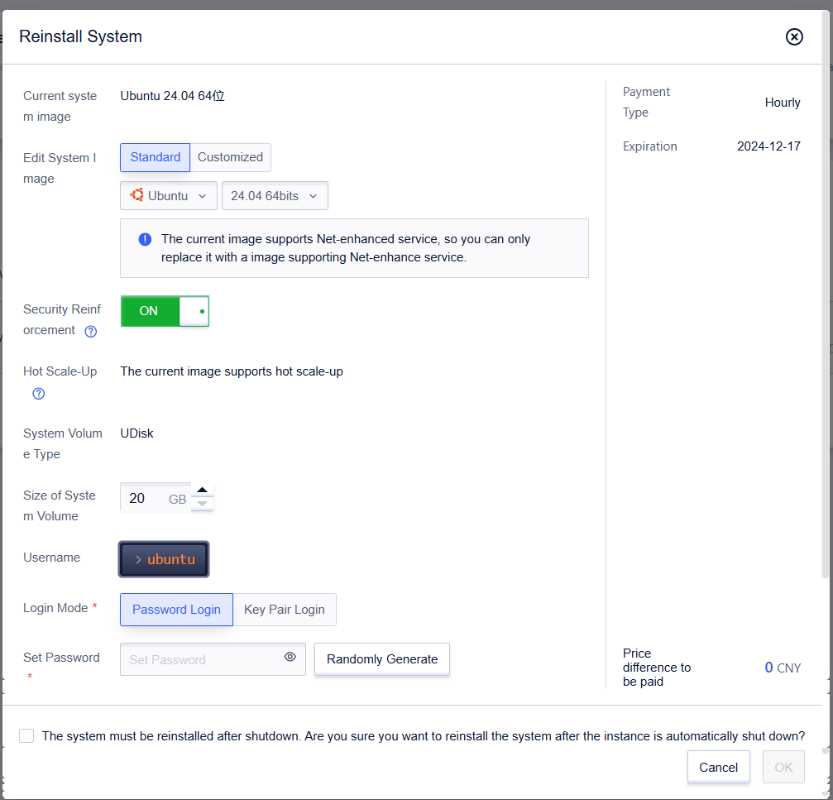
- If the system disk size is inconsistent with the original host when you reinstall the system, you need to make up the difference or initiate a refund. For details, please see Refund Explanation.
- Reinstating the host system needs to be done under the condition of shutdown, which will not cause changes to the internal and external network IP.
- Please pay attention to the change of the file system when reinstalling the system. If CentOS 6.x is reinstalled as 7.x, or Linux and Windows are mutually reinstalled, it may cause the data disk to be unrecognized.
- UHosts with network enhancements enabled cannot be reinstalled into systems that do not support network enhancements (such as Windows).
Host NTP Configuration Guide
NTP Server IP in Each Region
| Region | Availability Zone | NTP Server 1 | NTP Server 2 | NTP Server 3 |
|---|---|---|---|---|
| Beijing One | Availability Zone A | 10.255.255.1 | 10.255.255.2 | 0.cn.pool.ntp.org |
| North China One | Availability Zone B | 10.9.255.1 | 10.9.255.2 | 0.cn.pool.ntp.org |
| North China One | Availability Zone C | 10.10.255.1 | 10.10.255.2 | 0.cn.pool.ntp.org |
| North China One | Availability Zone D | 10.19.255.1 | 10.19.255.2 | 0.cn.pool.ntp.org |
| North China One | Availability Zone E | 10.42.255.1 | 10.42.255.2 | 0.cn.pool.ntp.org |
| South China(Guangzhou) | Availability Zone B | 10.13.255.1 | 10.13.255.2 | 0.cn.pool.ntp.org |
| Shanghai Financial Cloud | Availability Zone A | 10.15.255.1 | 10.15.255.2 | 0.cn.pool.ntp.org |
| Shanghai Two | Availability Zone A | 10.23.255.101 | 10.23.255.102 | 0.cn.pool.ntp.org |
| Shanghai Two | Availability Zone B | 10.23.255.101 | 10.23.255.102 | 0.cn.pool.ntp.org |
| Hong Kong | Availability Zone A | 10.8.255.1 | 10.8.255.2 | 0.cn.pool.ntp.org |
| Hong Kong | Availability Zone B | 10.8.255.1 | 10.8.255.2 | 0.cn.pool.ntp.org |
| US(Los Angeles) | Availability Zone A | 10.11.255.1 | 10.11.255.2 | 0.cn.pool.ntp.org |
| US(Washington) | Availability Zone A | 10.27.255.101 | 10.27.255.102 | 0.cn.pool.ntp.org |
| Singapore | Availability Zone A | 10.35.255.1 | 10.35.255.2 | 0.cn.pool.ntp.org |
| TH(Bangkok) | Availability Zone A | 10.31.255.101 | 10.31.255.102 | 0.cn.pool.ntp.org |
| Kaohsiung | Availability Zone A | 10.37.255.101 | 10.37.255.102 | 0.cn.pool.ntp.org |
| Taiwan(Taipei) | Availability Zone A | 10.41.255.1 | 10.41.255.2 | 0.cn.pool.ntp.org |
| ID(Jakarta) | Availability Zone A | 10.45.255.1 | 10.45.255.2 | 0.cn.pool.ntp.org |
| IN(Mumbai) | Availability Zone A | 10.47.255.1 | 10.47.255.2 | 0.cn.pool.ntp.org |
| KR(Seoul) | Availability Zone A | 10.33.255.101 | 10.33.255.102 | 0.cn.pool.ntp.org |
| JP(Tokyo) | Availability Zone A | 10.40.255.1 | 10.40.255.2 | 0.cn.pool.ntp.org |
| DE(Frankfurt) | Availability Zone A | 10.29.255.101 | 10.29.255.102 | 0.cn.pool.ntp.org |
| AE(Dubai) | Availability Zone A | 10.44.255.1 | 10.44.255.2 | 0.cn.pool.ntp.org |
| BR(Sao Paulo) | Availability Zone A | 10.49.255.1 | 10.49.255.2 | 0.cn.pool.ntp.org |
Each machine should at least be configured with two Surfercloud NTP server IPs and one external NTP server, corresponding to upstream1, upstream2, and offical_upstream3 in the following documents.
Modification of NTP in Various Operating Systems
CentOS/Ubuntu/Redhat/Debian/Gentoo
NTP configuration file location: /etc/ntp.conf
- Modification Method
Add the corresponding NTP server IP according to the available area
Restrict area:
Add restrict 10.255.255.1
Add restrict 10.255.255.2

Server area:
Original configuration:
server 0.asia.pool.ntp.org
server 1.asia.pool.ntp.org
server 2.asia.pool.ntp.org
server 3.asia.pool.ntp.org (3.gentoo.pool.ntp.org)
Replace with:
server 10.255.255.1 iburst minpoll 3 maxpoll 4 prefer
server 10.255.255.2 iburst minpoll 3 maxpoll 4 prefer
server 0.cn.pool.ntp.org iburst minpoll 3 maxpoll 4

Function: Shorten the clock synchronization polling cycle and prioritize the NTP service of Surfercloud
Add fine-tuning parameters
CentOS 6.x
Add tinker dispersion 100
Add tinker step 1800
Add tinker stepout 3600

Function: Speed up fine tuning and control the fine tuning range
CentOS 7.x
Add tinker dispersion 100
Add tinker stepout 3600

Function: Speed up fine tuning and control the fine tuning range- Testing Method
Restart ntp service
CentOS/Redhat/Gentoo:
# service ntpd restart

Ubuntu:
# sudo service ntp restart

Debian:
# service ntp restart
Check NTP server IP
# ntpq -pn
If the table shows Surfercloud server IP, it means ntp configuration is correct
Ensure that the machine can jump to synchronize the time first, execute the ntpdate or date command to set the time, and then start the ntp synchronization service.
Specific operation:
# service ntpd stop
# ntpdate upstream1 or # date -s "Y-m-D H:M:S"
# service ntpd start
OpenSUSE
NTP configuration file location: /etc/ntp.conf
- Modification Method
Add restrict parameters
restrict -4 default kod notrap nomodify nopeer noquery
restrict -6 default kod notrap nomodify nopeer noquery
Add the corresponding NTP server IP according to the available area
Restrict area
Add restrict 10.255.255.1
Add restrict 10.255.255.2

Server area
Original configuration:
server 0.asia.pool.ntp.org
server 1.asia.pool.ntp.org
server 3.asia.pool.ntp.org (3.gentoo.pool.ntp.org)
Replace with:
server 10.255.255.1 iburst minpoll 3 maxpoll 4 prefer
server 10.255.255.2 iburst minpoll 3 maxpoll 4 prefer
server 0.cn.pool.ntp.org iburst minpoll 3 maxpoll 4

Function: Shorten the clock synchronization polling cycle and prioritize the NTP service of Surfercloud- Testing Method
Restart ntp service
# service ntp restartCheck NTP server IP
# ntpq -pn
If the table displays Surfercloud server IP, it means ntp configuration is correct
Ensure that the machine can jump to synchronize the time first, execute the ntpdate or date command to set the time, and then start the ntp synchronization service.
Specific operation:
# service ntpd stop
# ntpdate upstream1 or # date -s "Y-m-D H:M:S"
# service ntpd start
You can download and run the script mod_ntp.sh to complete the configuration.
Windows
- Modification Method
Modify the Windows Time service to start automatically
  1. Type "services.msc" in the terminal, open the service list, find "Windows Time", change the startup type to "Automatic", and start the service; (If it is already started, ignore it).
  2. For 2008 and 2012 users, 64-bit machines need to type `sc triggerinfo w32time start/networkon stop/networkoff` in the terminal.
  (The above command is a cmd command and cannot be run in powershell).
Modify group policy
- Enable Windows NTP client
    1. Type "gpedit.msc" in the terminal to open the Group Policy Editor.
2. Computer Configuration\\Administrative Templates\\System\\Windows Time Service\\Time Providers\\Configure Windows NTP Client", change its status to "Enabled".- Configure Windows NTP client parameters
    1. Configure the "NtpServer" value corresponding to the available zone as "upstream1,0x9 upstream2, 0x9official_upstream3,0x9".
    2. Change the "Type" value to NTP.
3. Modify the "SpecialPollInterval" to a value between 30-60s.- Enable global settings
Change the "MaxAllowPhaseOffset" to 3600
Change the "MaxNegPhaseCorrection" to 3600
Change the "MaxPosPhaseCorrection" to 3600
Change the "PhaseCorrectRate" value to "7"
Change the "MinPollInterval" value to "3"
Change the "MaxPollInterval" value to "4"- Testing Method
- Run the command
gpupdate /forcein the command line to force the group policy to update; - After completing the above configuration, ensure that the machine can jump to synchronize time, execute
w32tm/resyncat the terminal to make the client send a clock synchronization request to the server and complete the immediate synchronization; - Enter
w32tm /query /statusin the terminal command line to check the synchronization information.