
Configuration Management
Modify Node Configuration
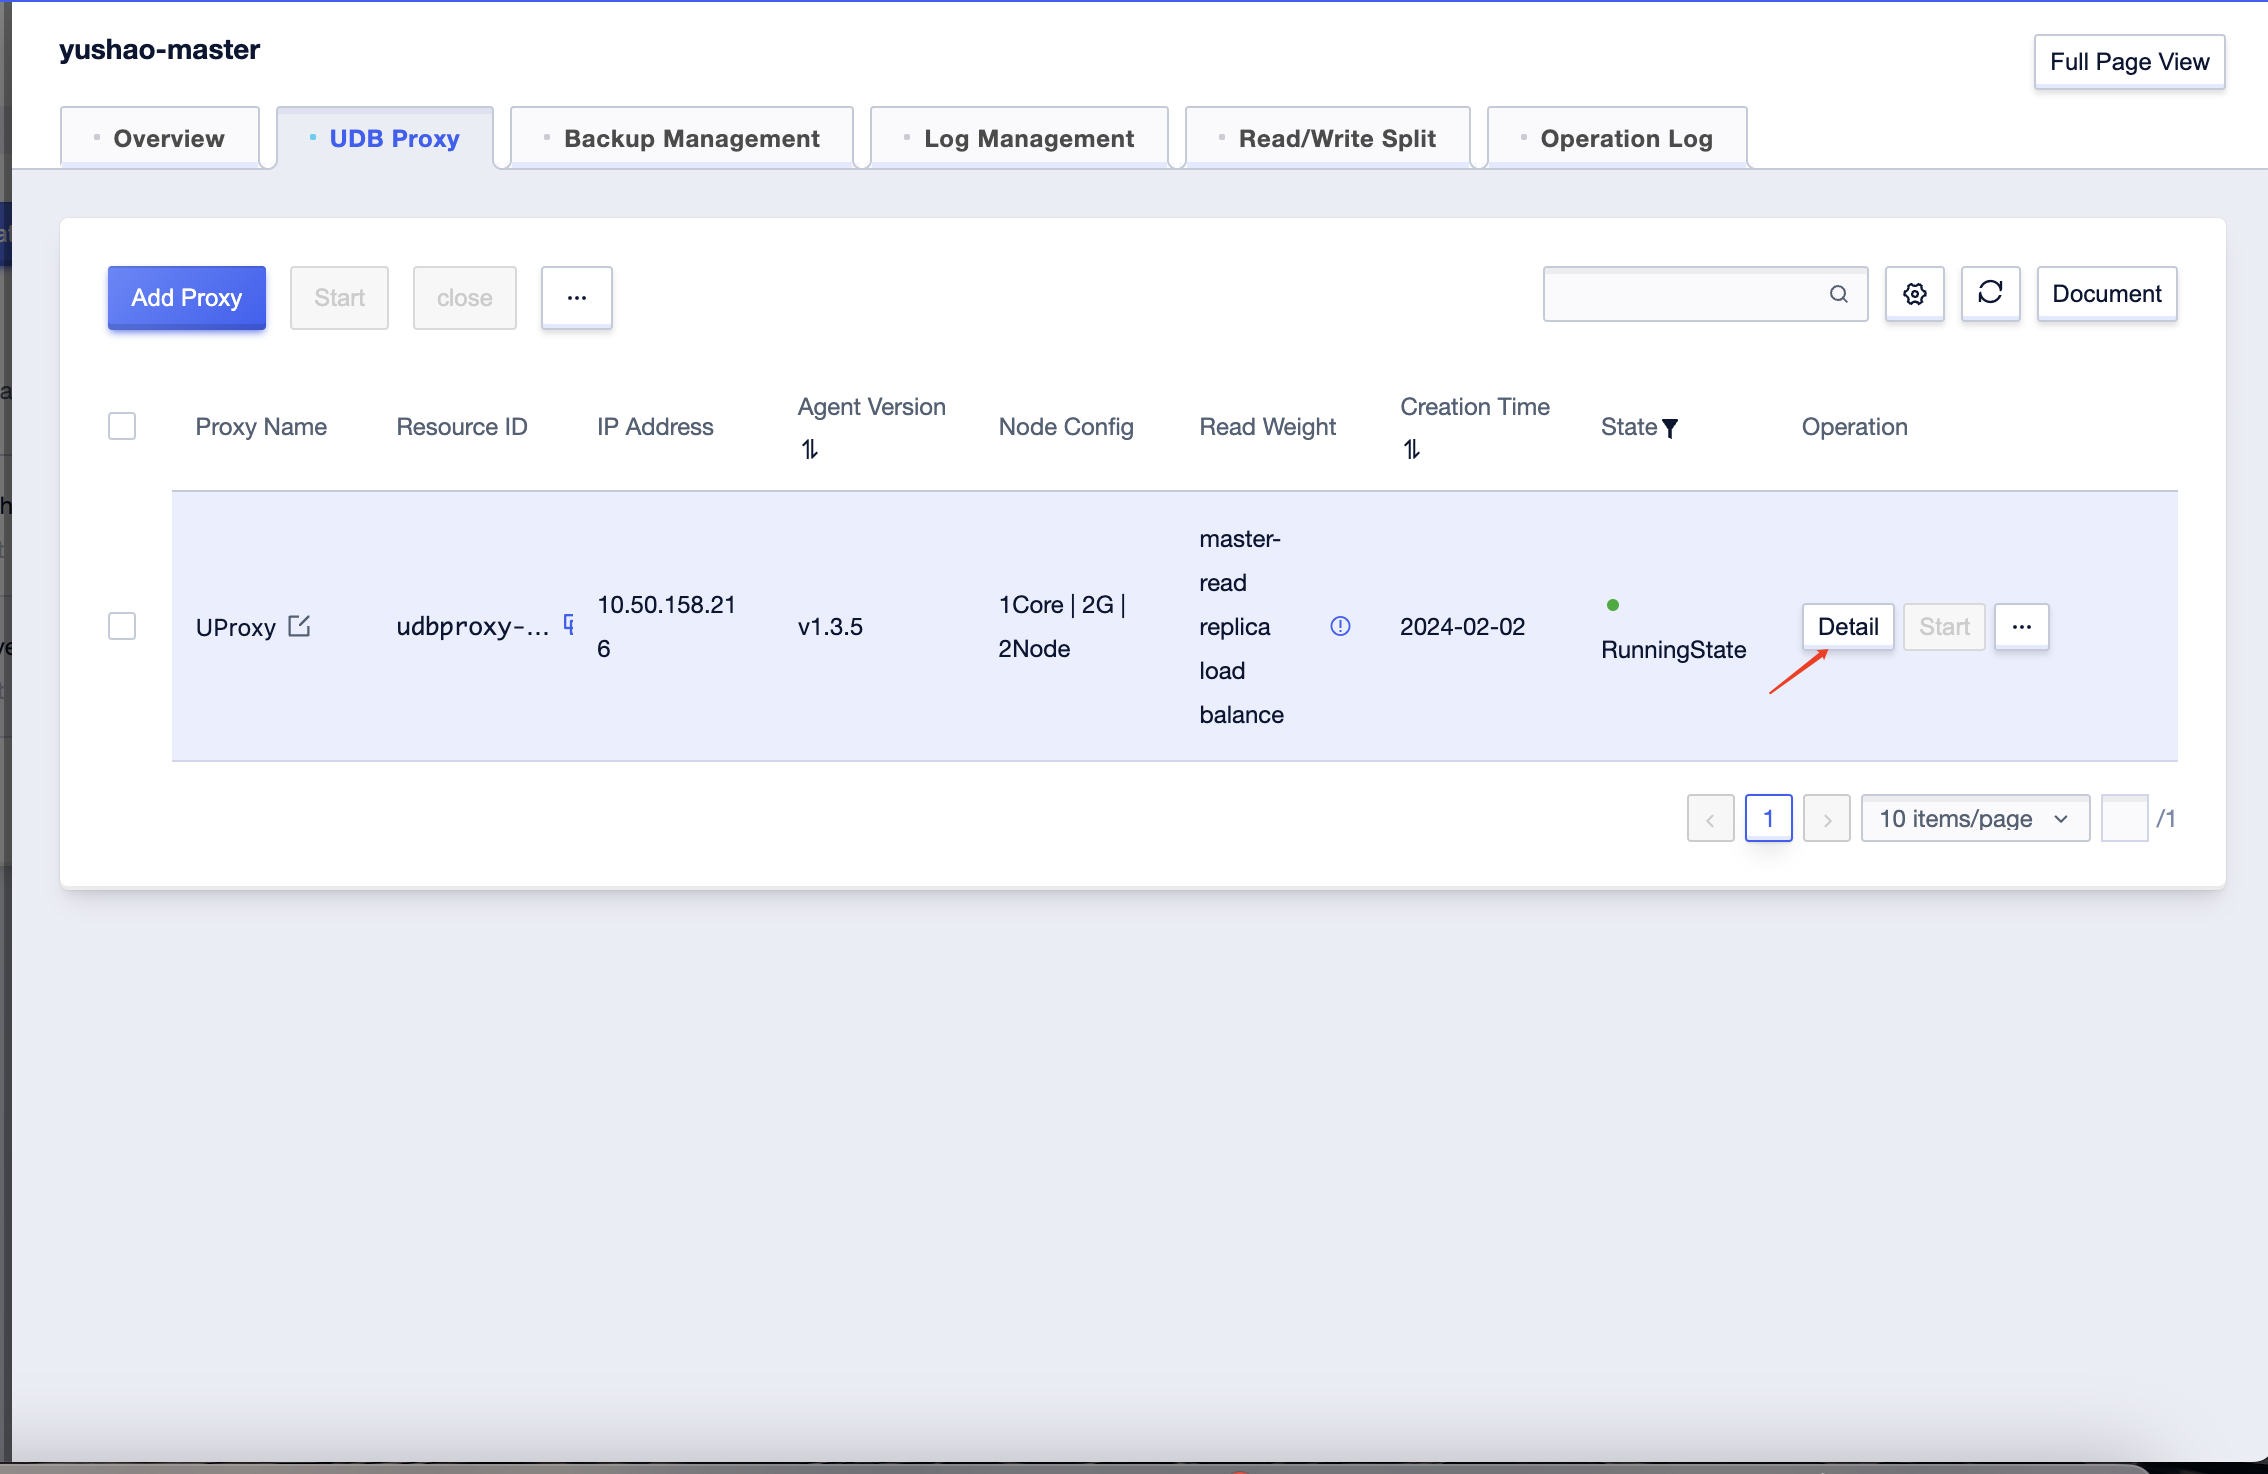
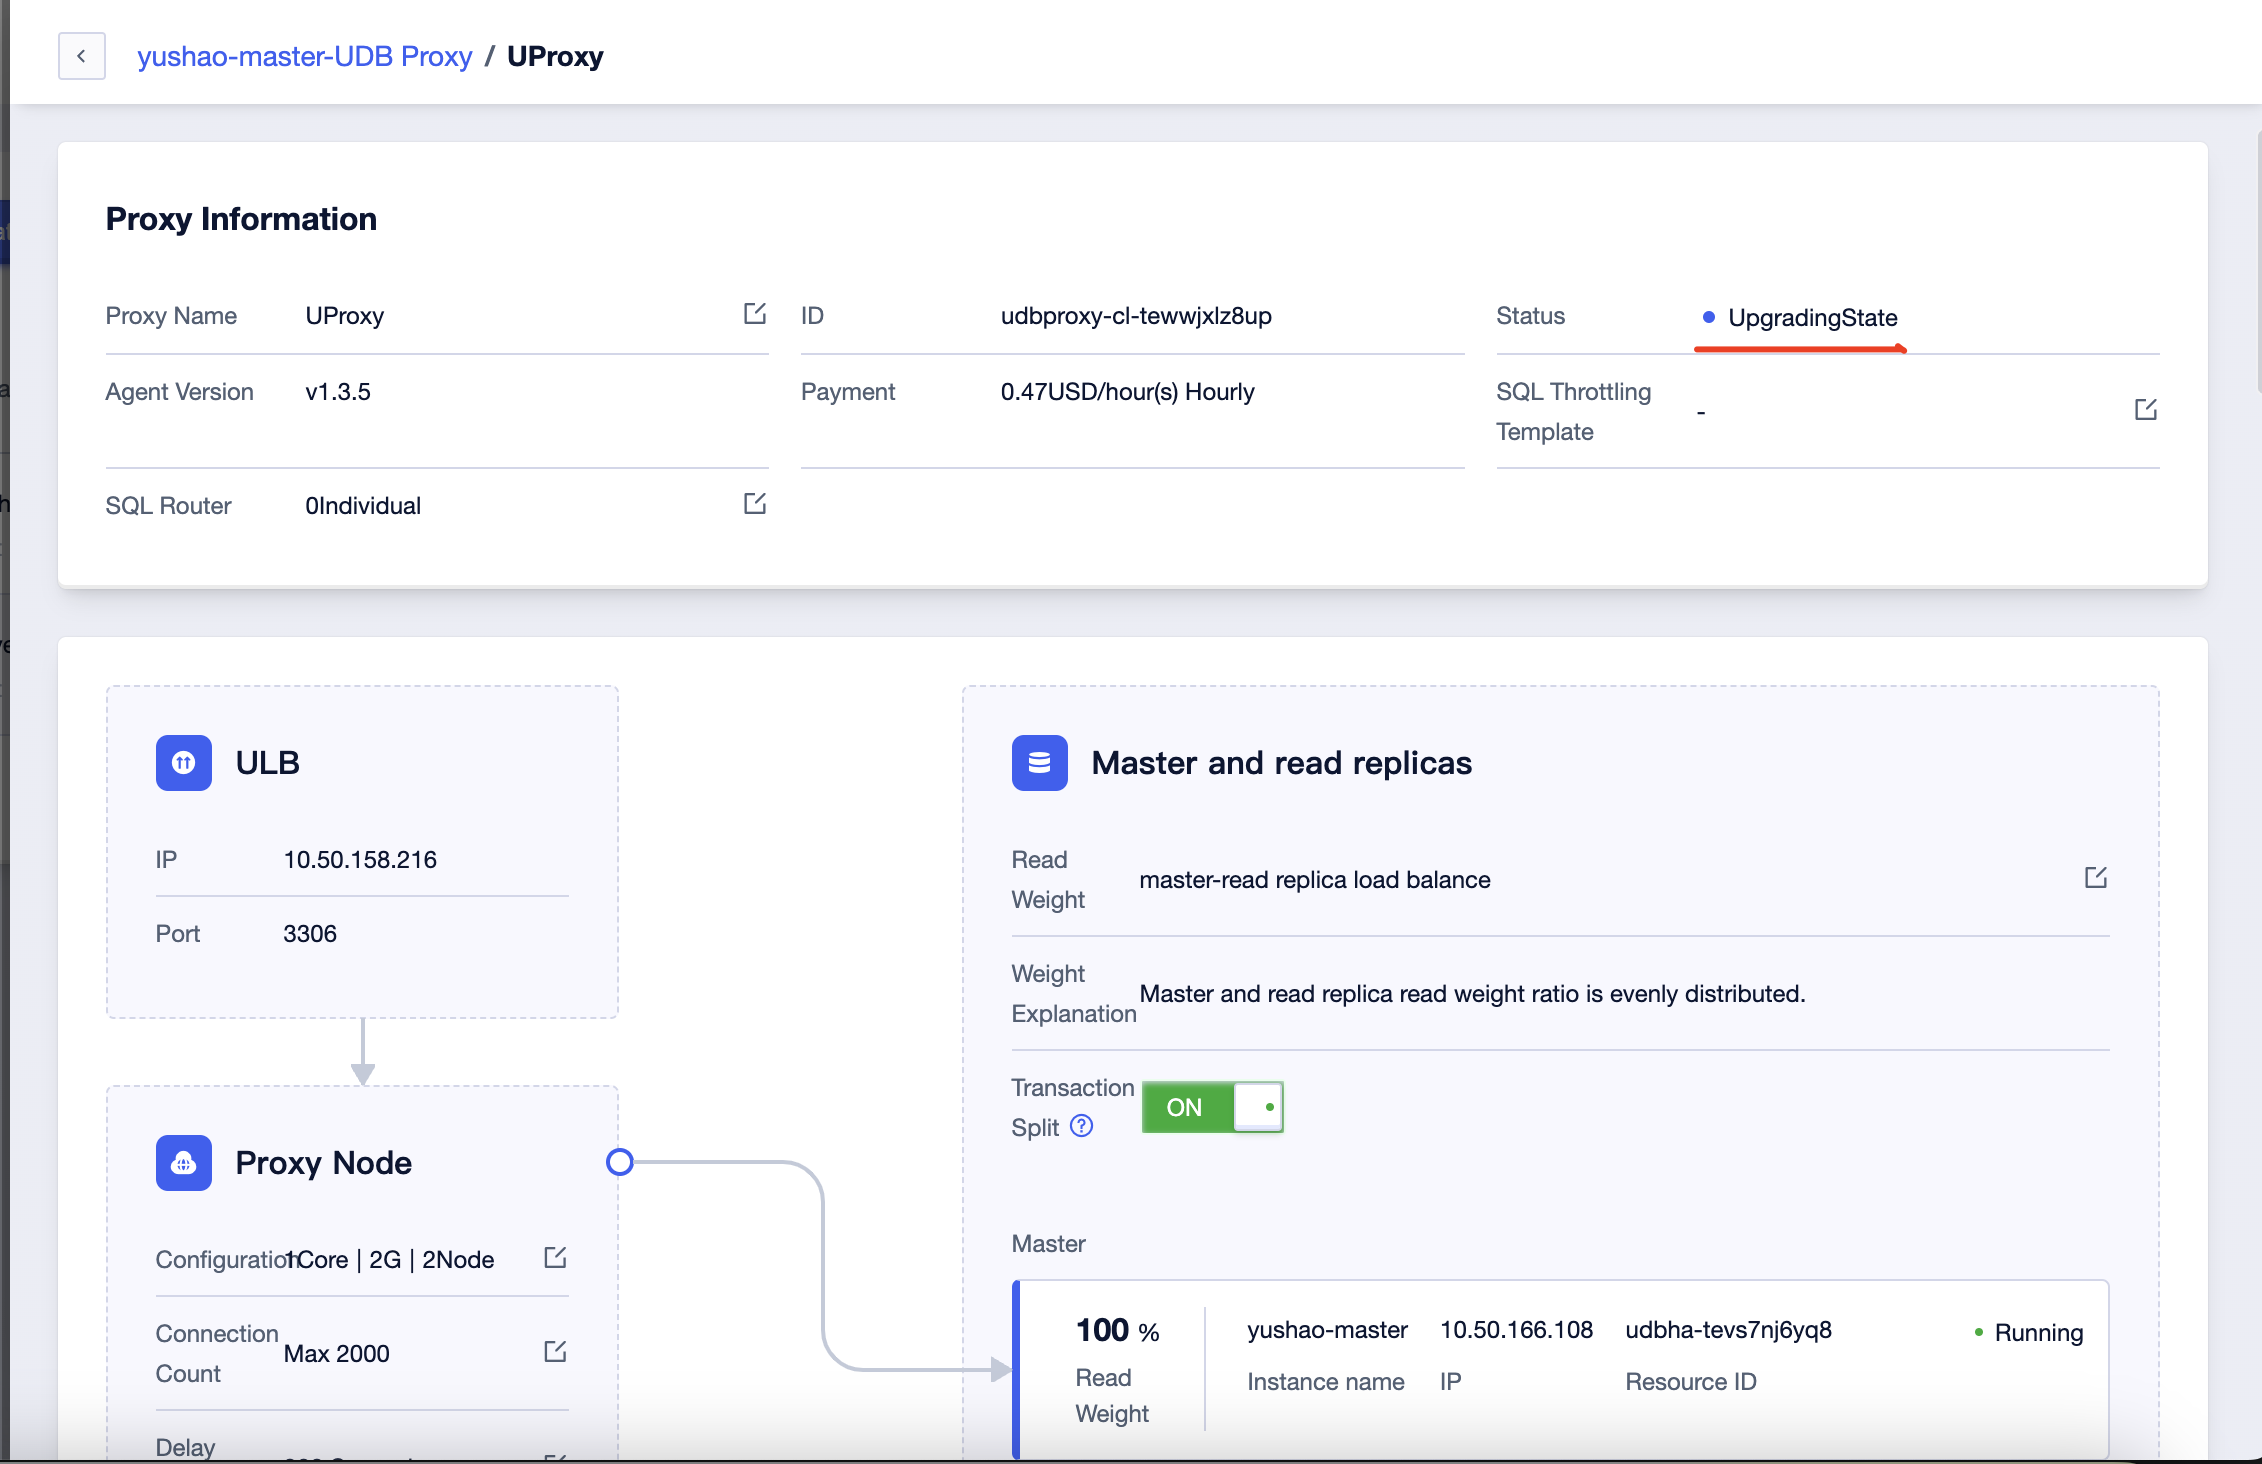
Click on 'Details' for the proxy to enter the details page.
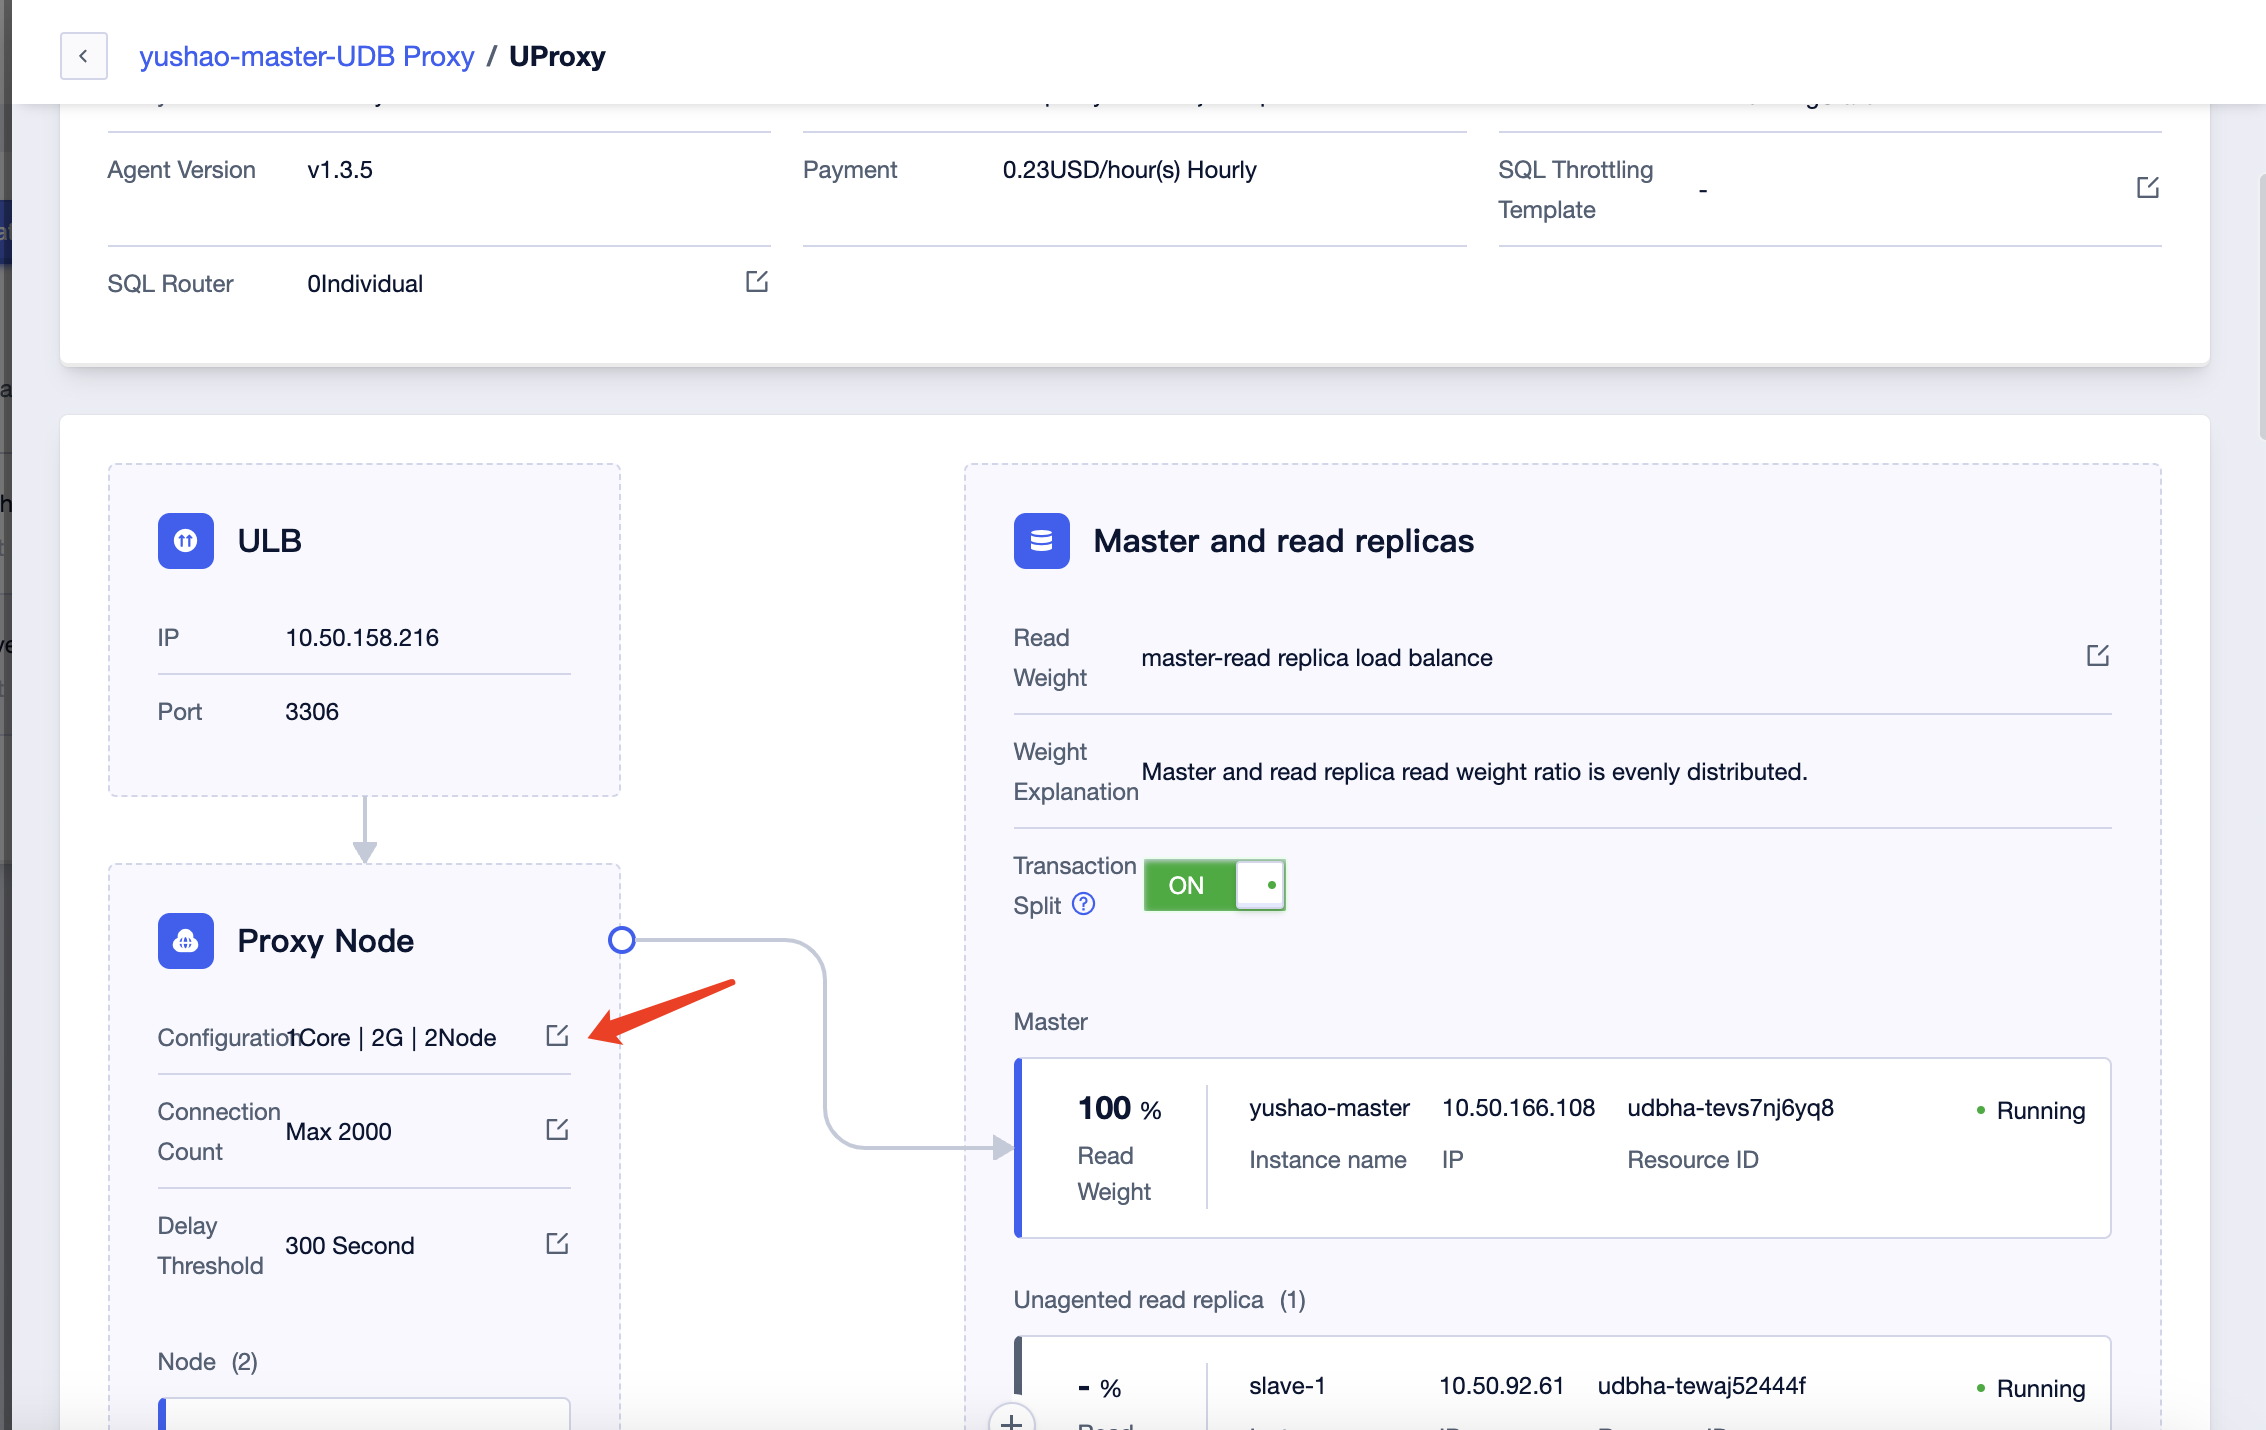
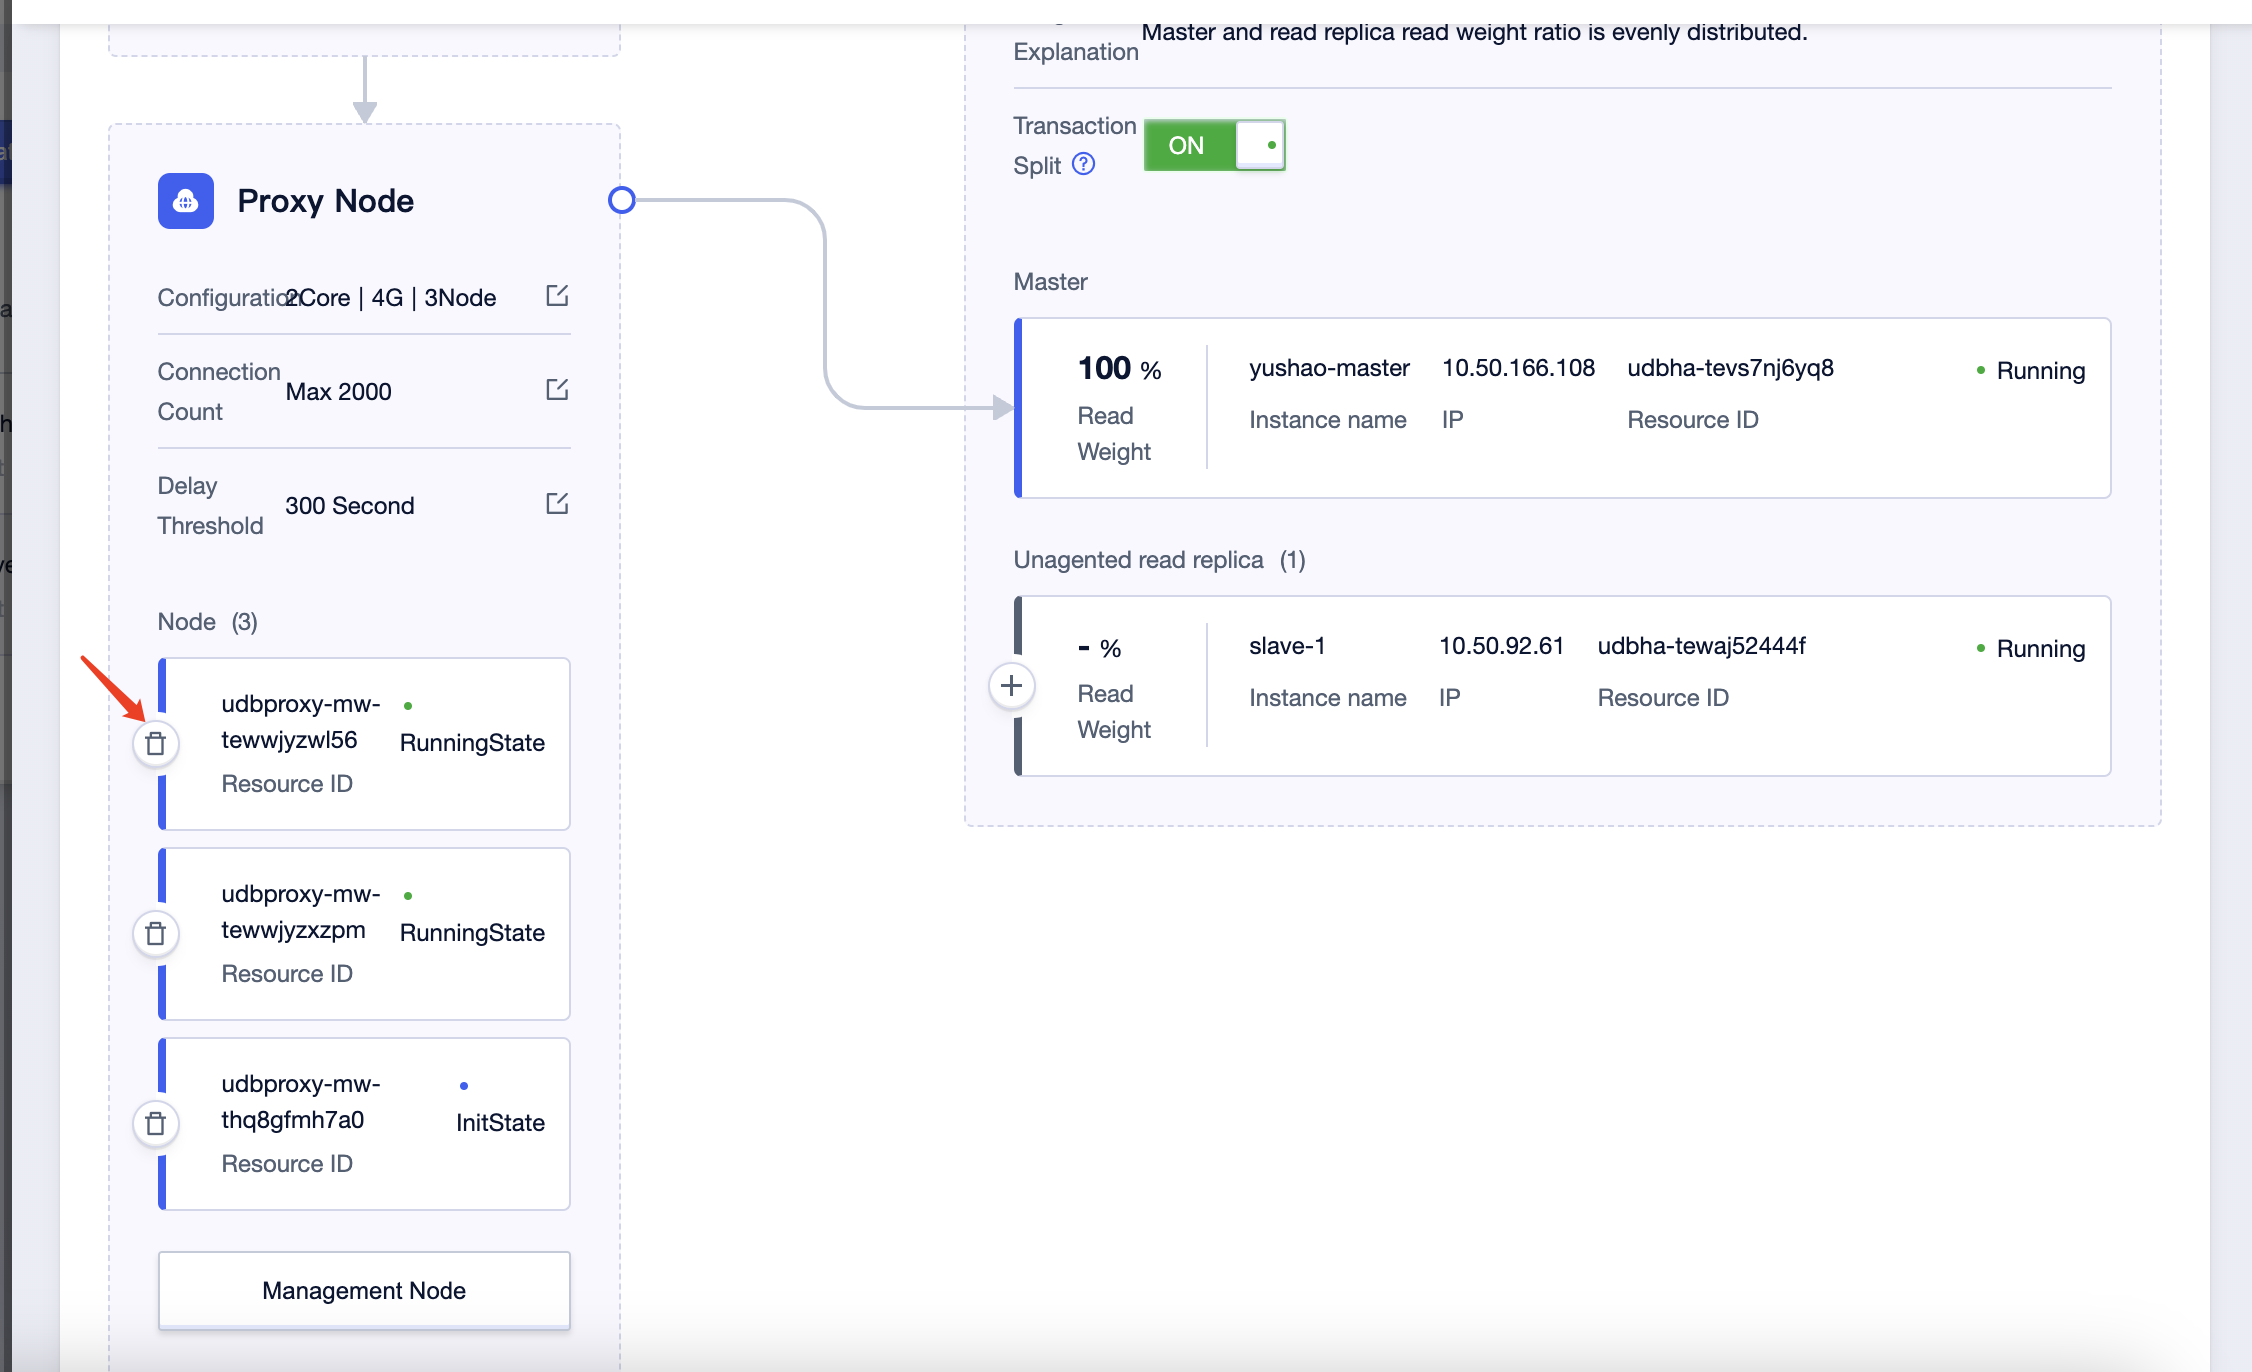
In the middle-left section of the Database Proxy details page, you will find the configuration of proxy nodes. Click on the 'Edit' button on the right to go to the 'Modify Node Configuration' page.
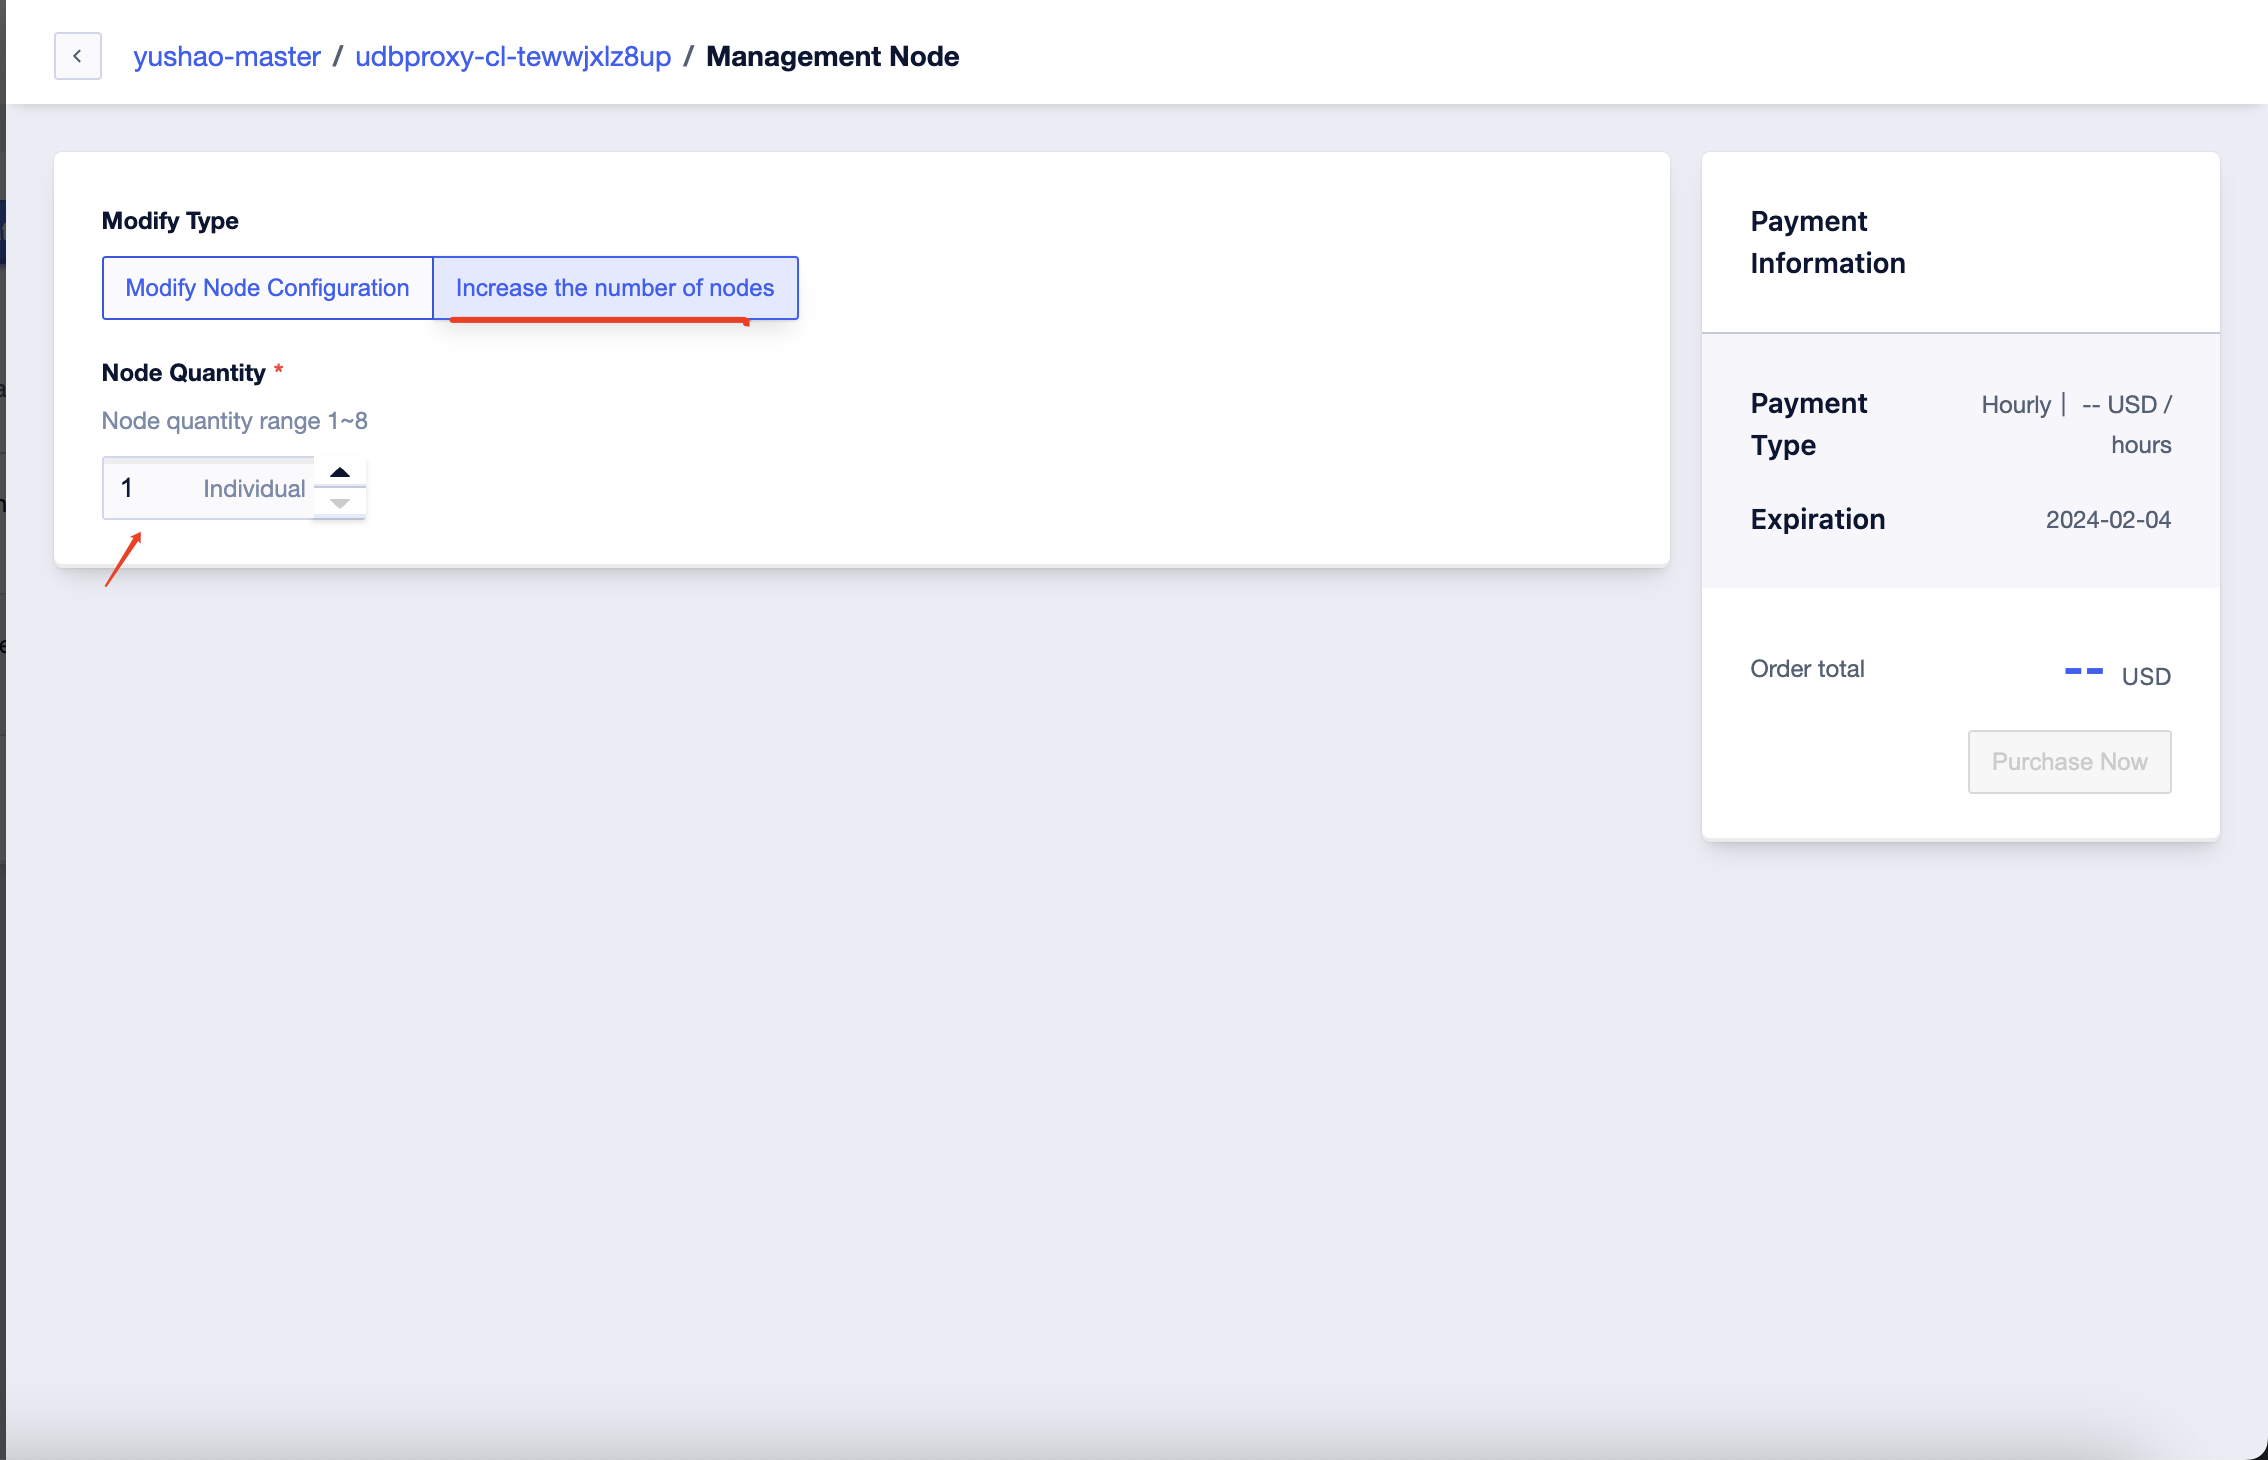
here are two options inside: 'Modify Node Configuration' and 'Increase Node Quantity.' Here, select 'Modify Node Configuration,' and click on 'Buy Now' on the right to proceed to the payment page.
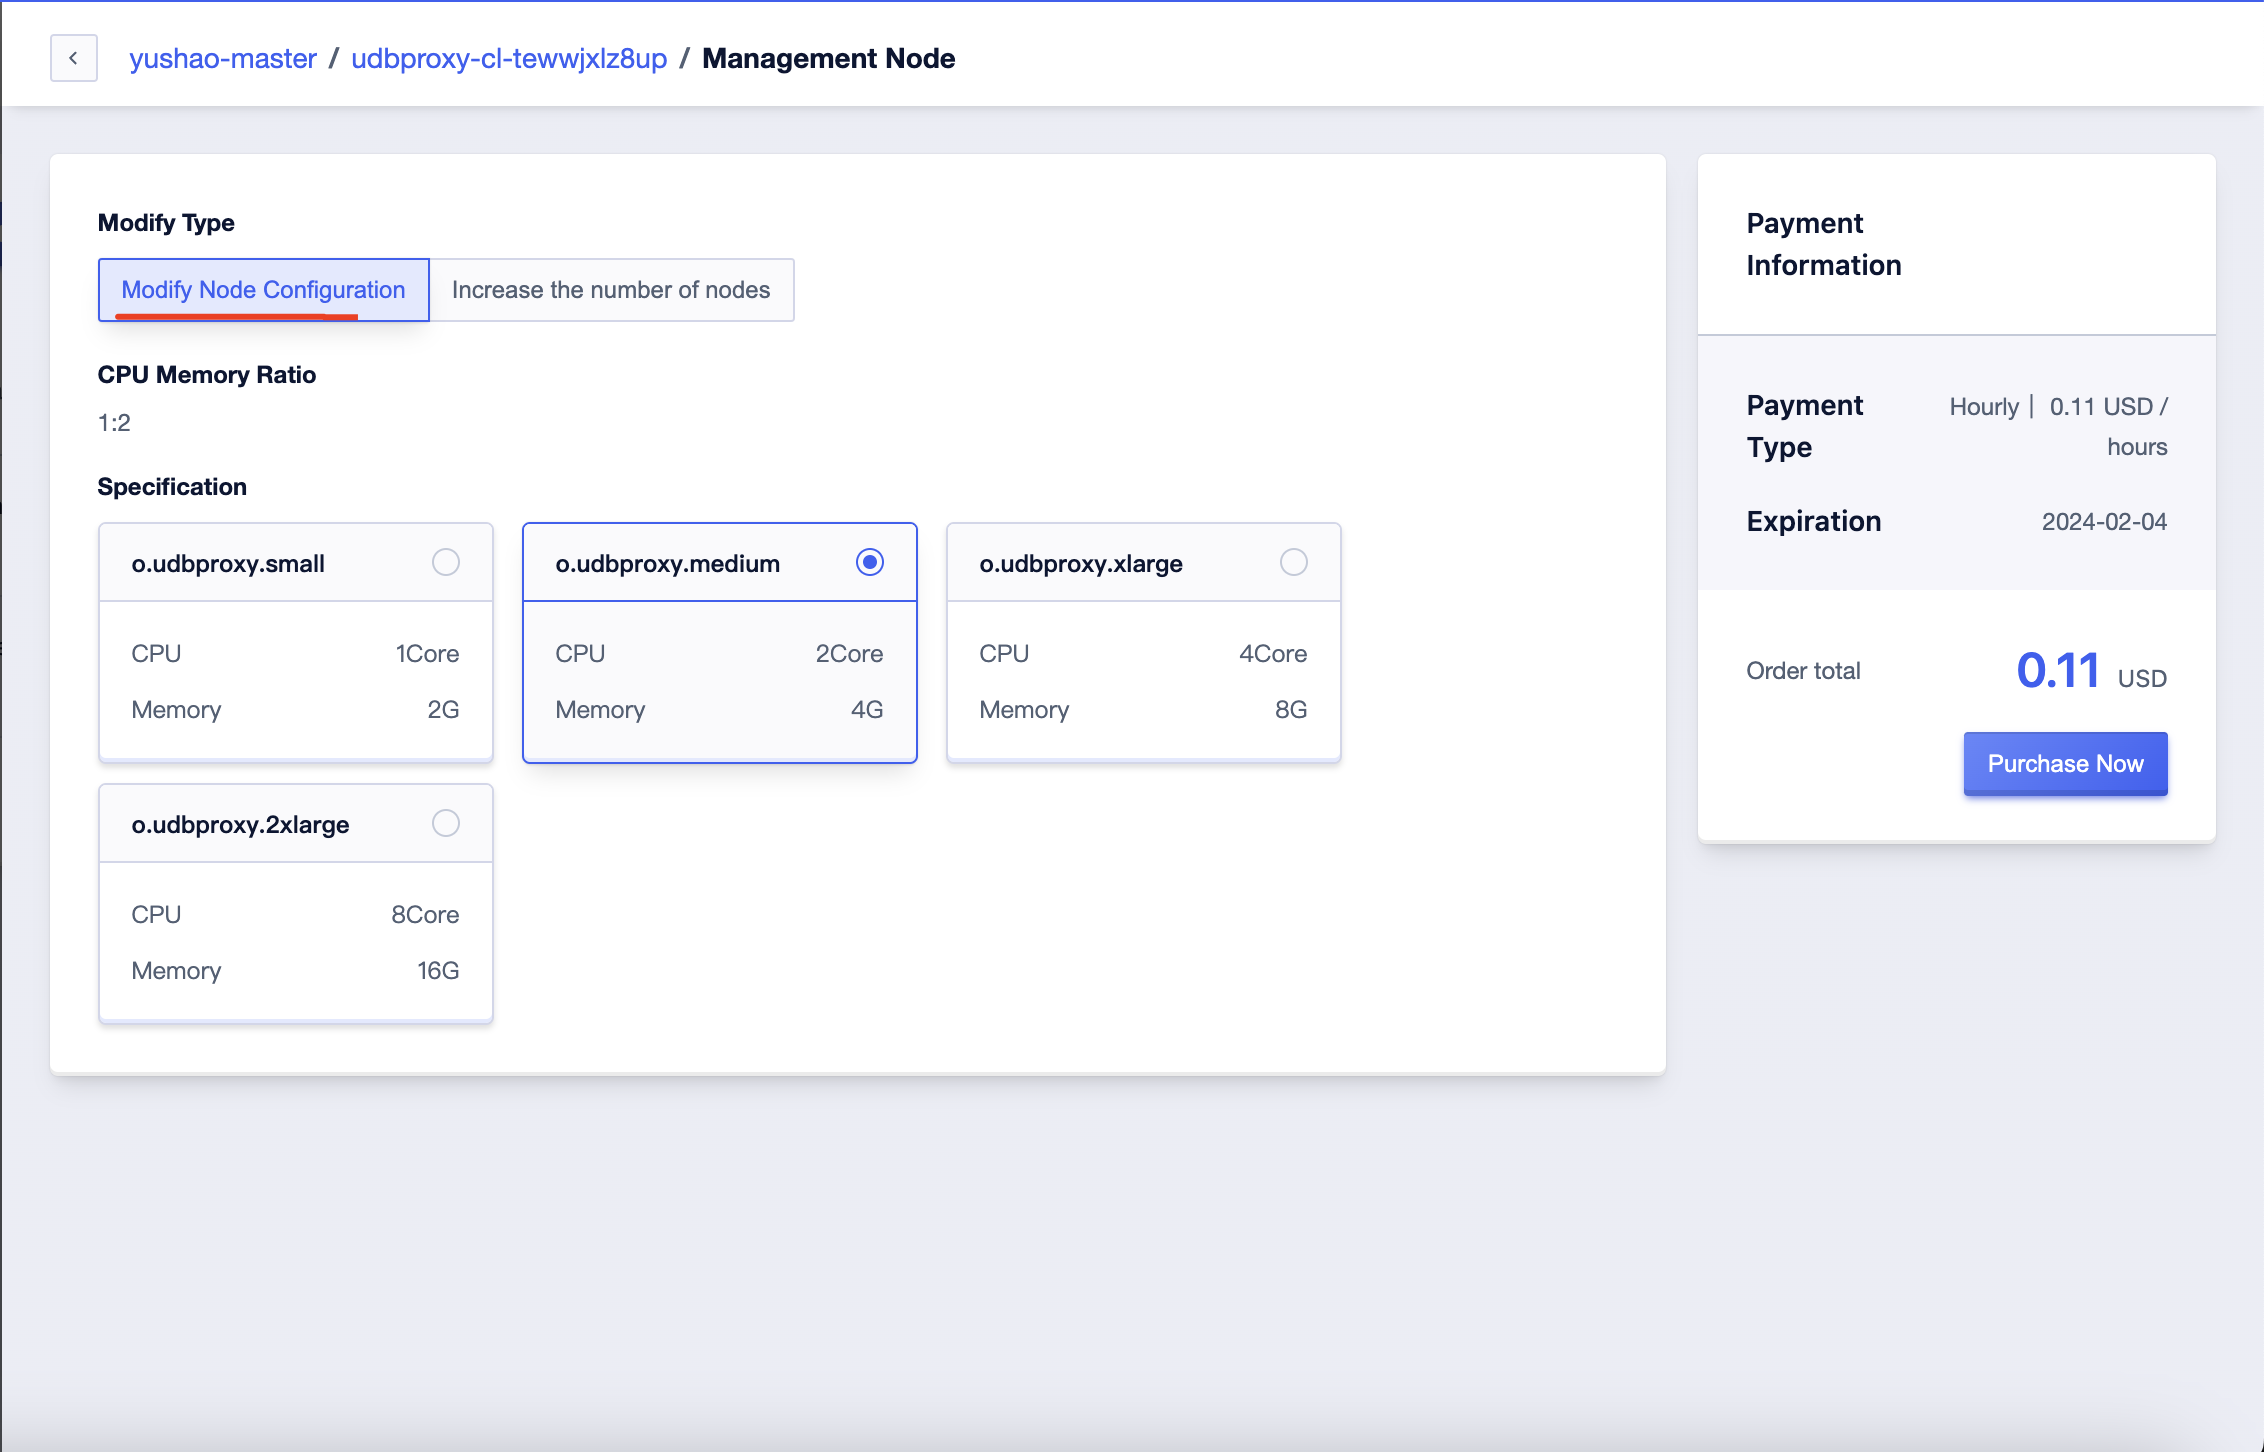
Following this, you will be directed to the payment page, where the system will automatically calculate and adjust the price based on the selected configuration changes. After confirming that the order information is correct, click the 'Pay Now' button on the right.
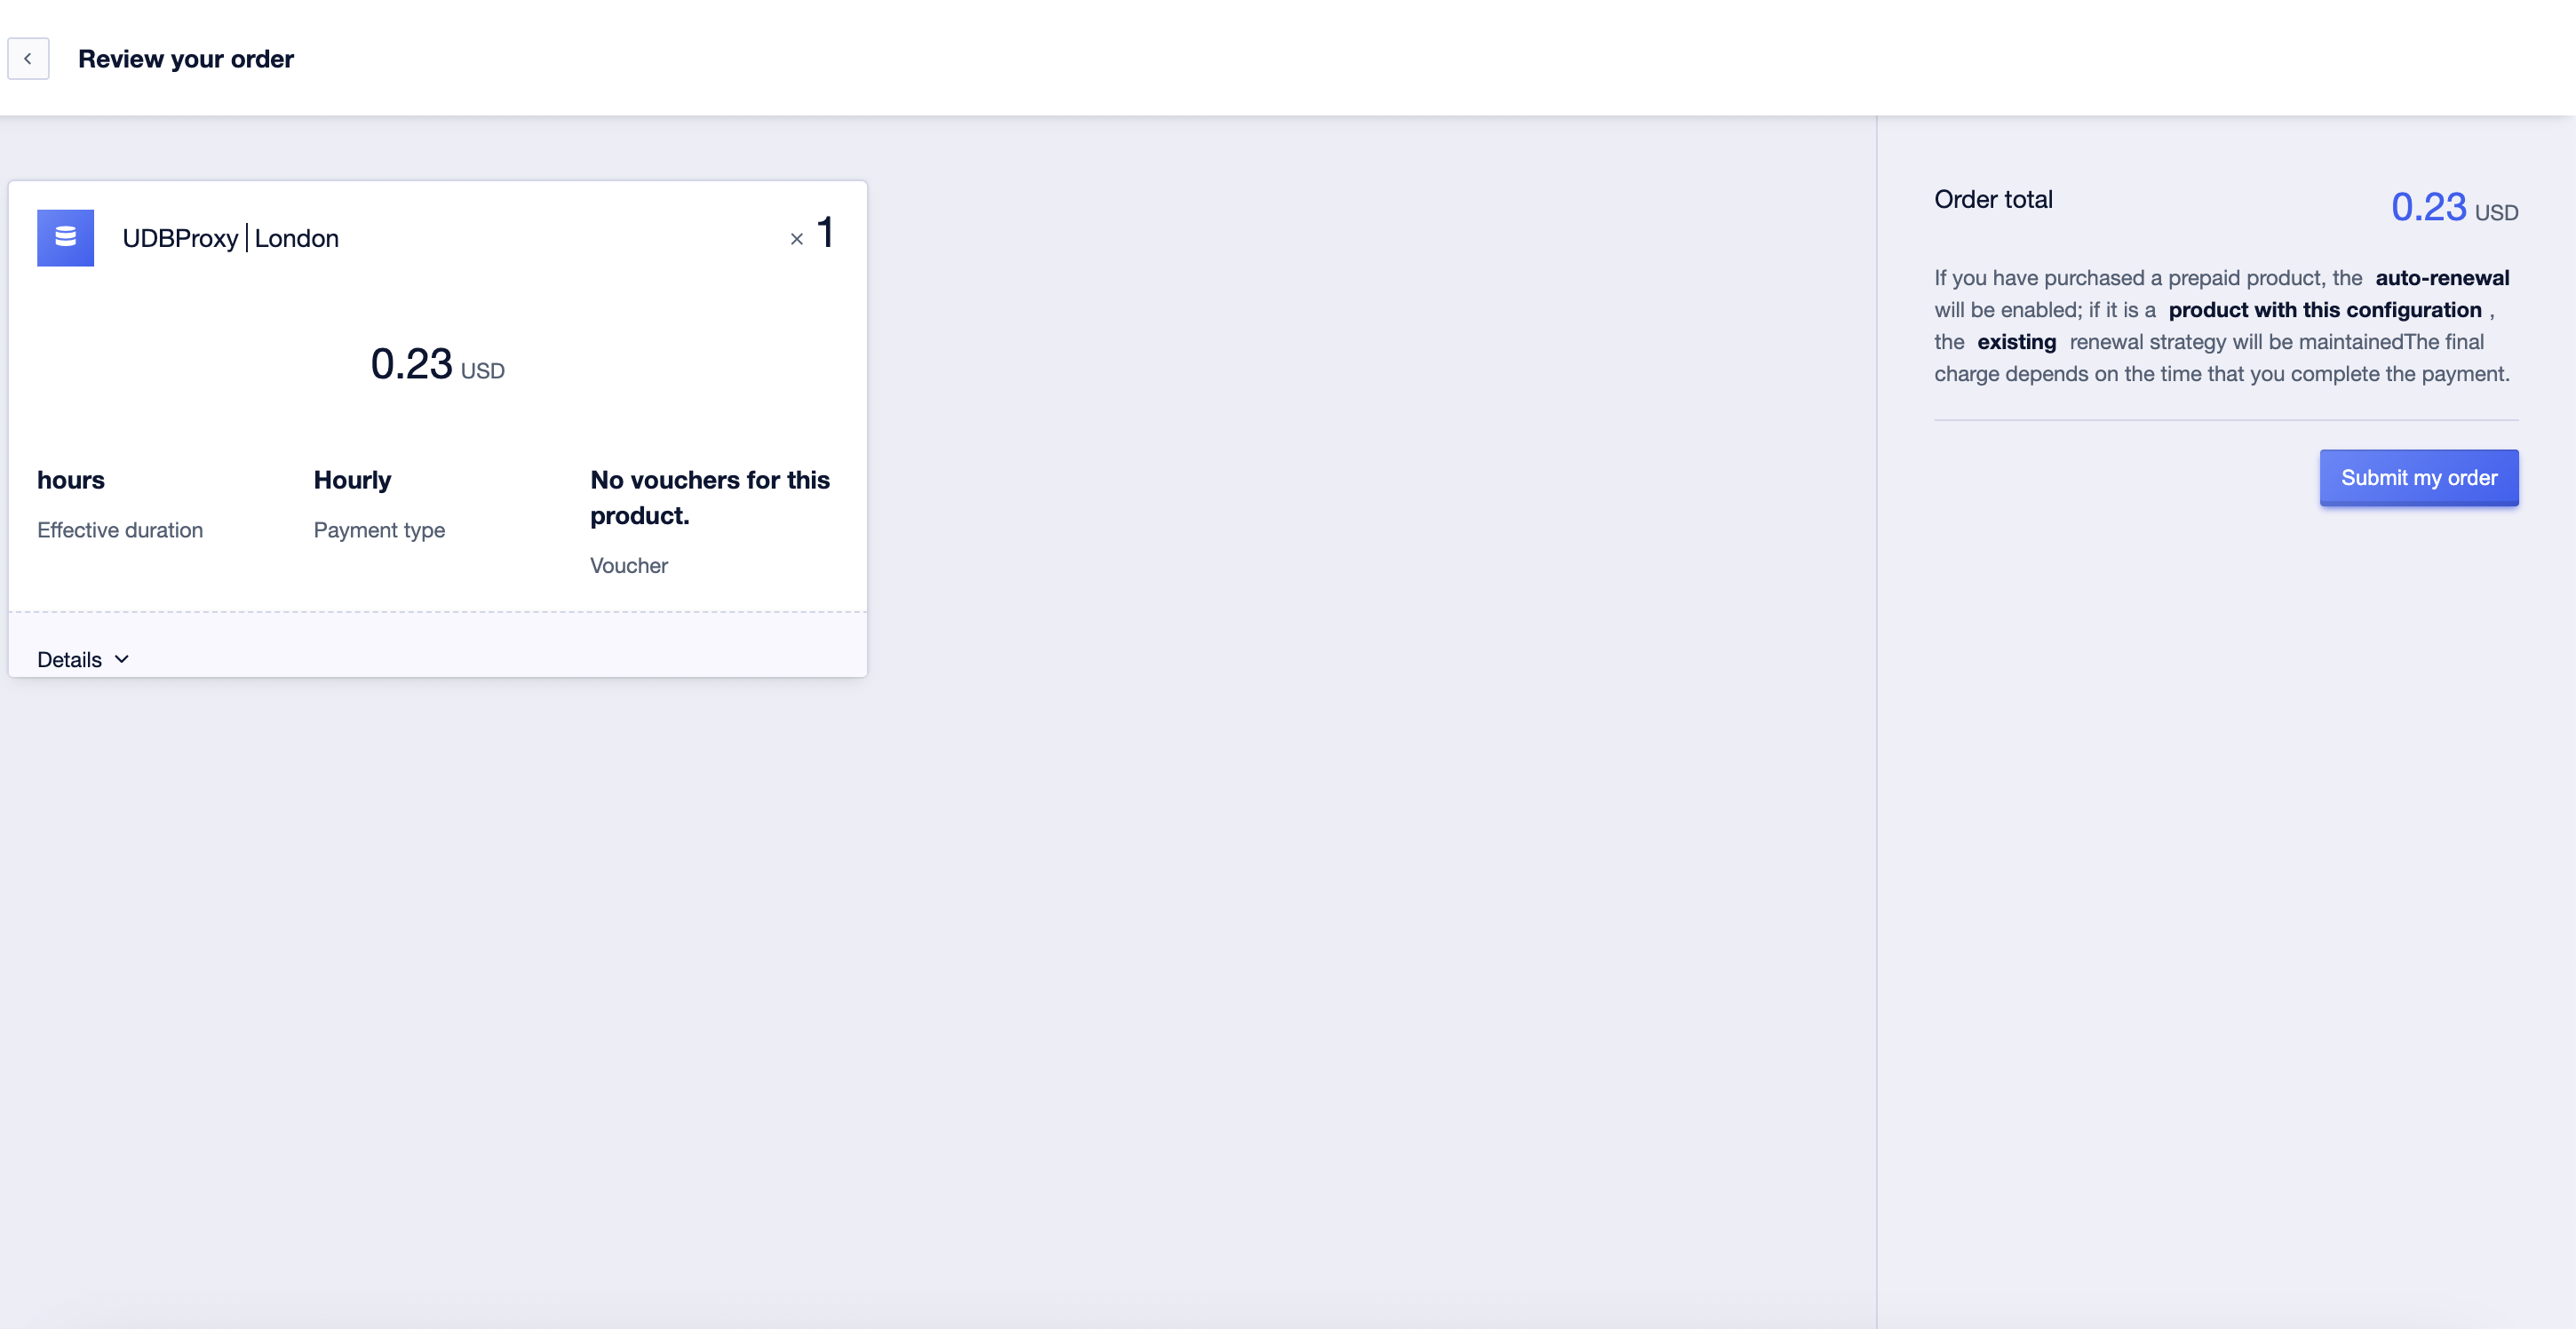 After the payment is completed, you will be automatically redirected to the Database Proxy page, and at this point, both the instance and nodes will be in the process of upgrading or downgrading.
Scale Nodes
In the second step mentioned above, there is an option to 'Increase Node Quantity.' Clicking on it will allow you to input the number of nodes to add, and then click 'Buy Now' on the right.
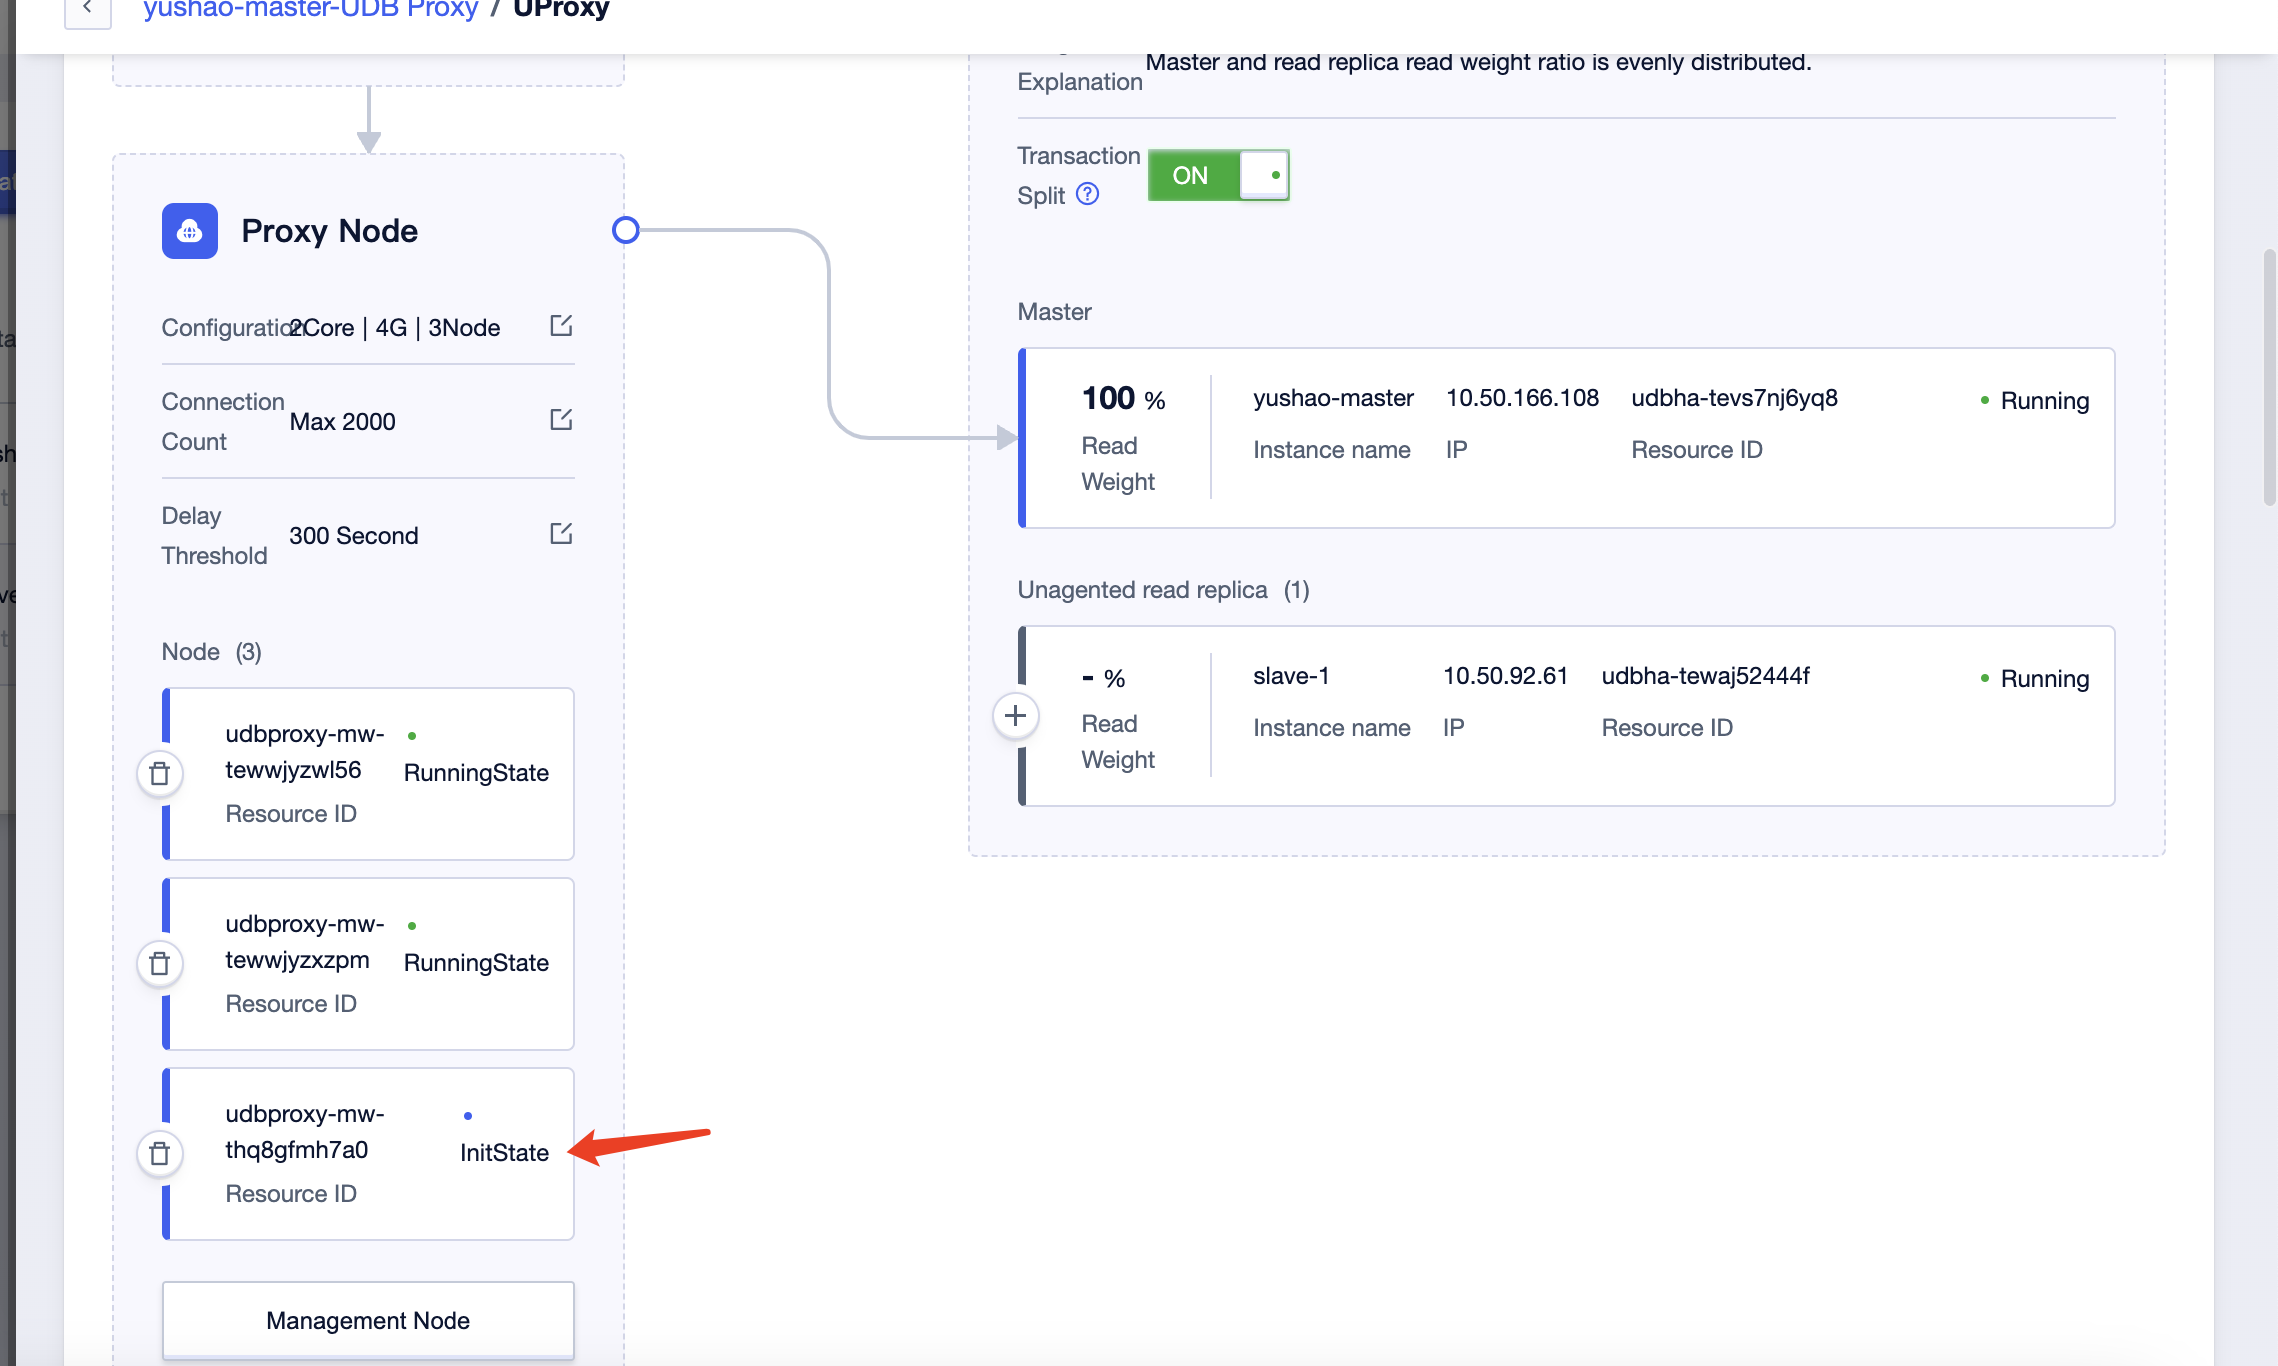
 After completing the immediate payment, the newly added nodes will be in the 'Initializing' state. Wait for some time, and the nodes will transition to a usable 'Running' state.
Reduce Node Capacity
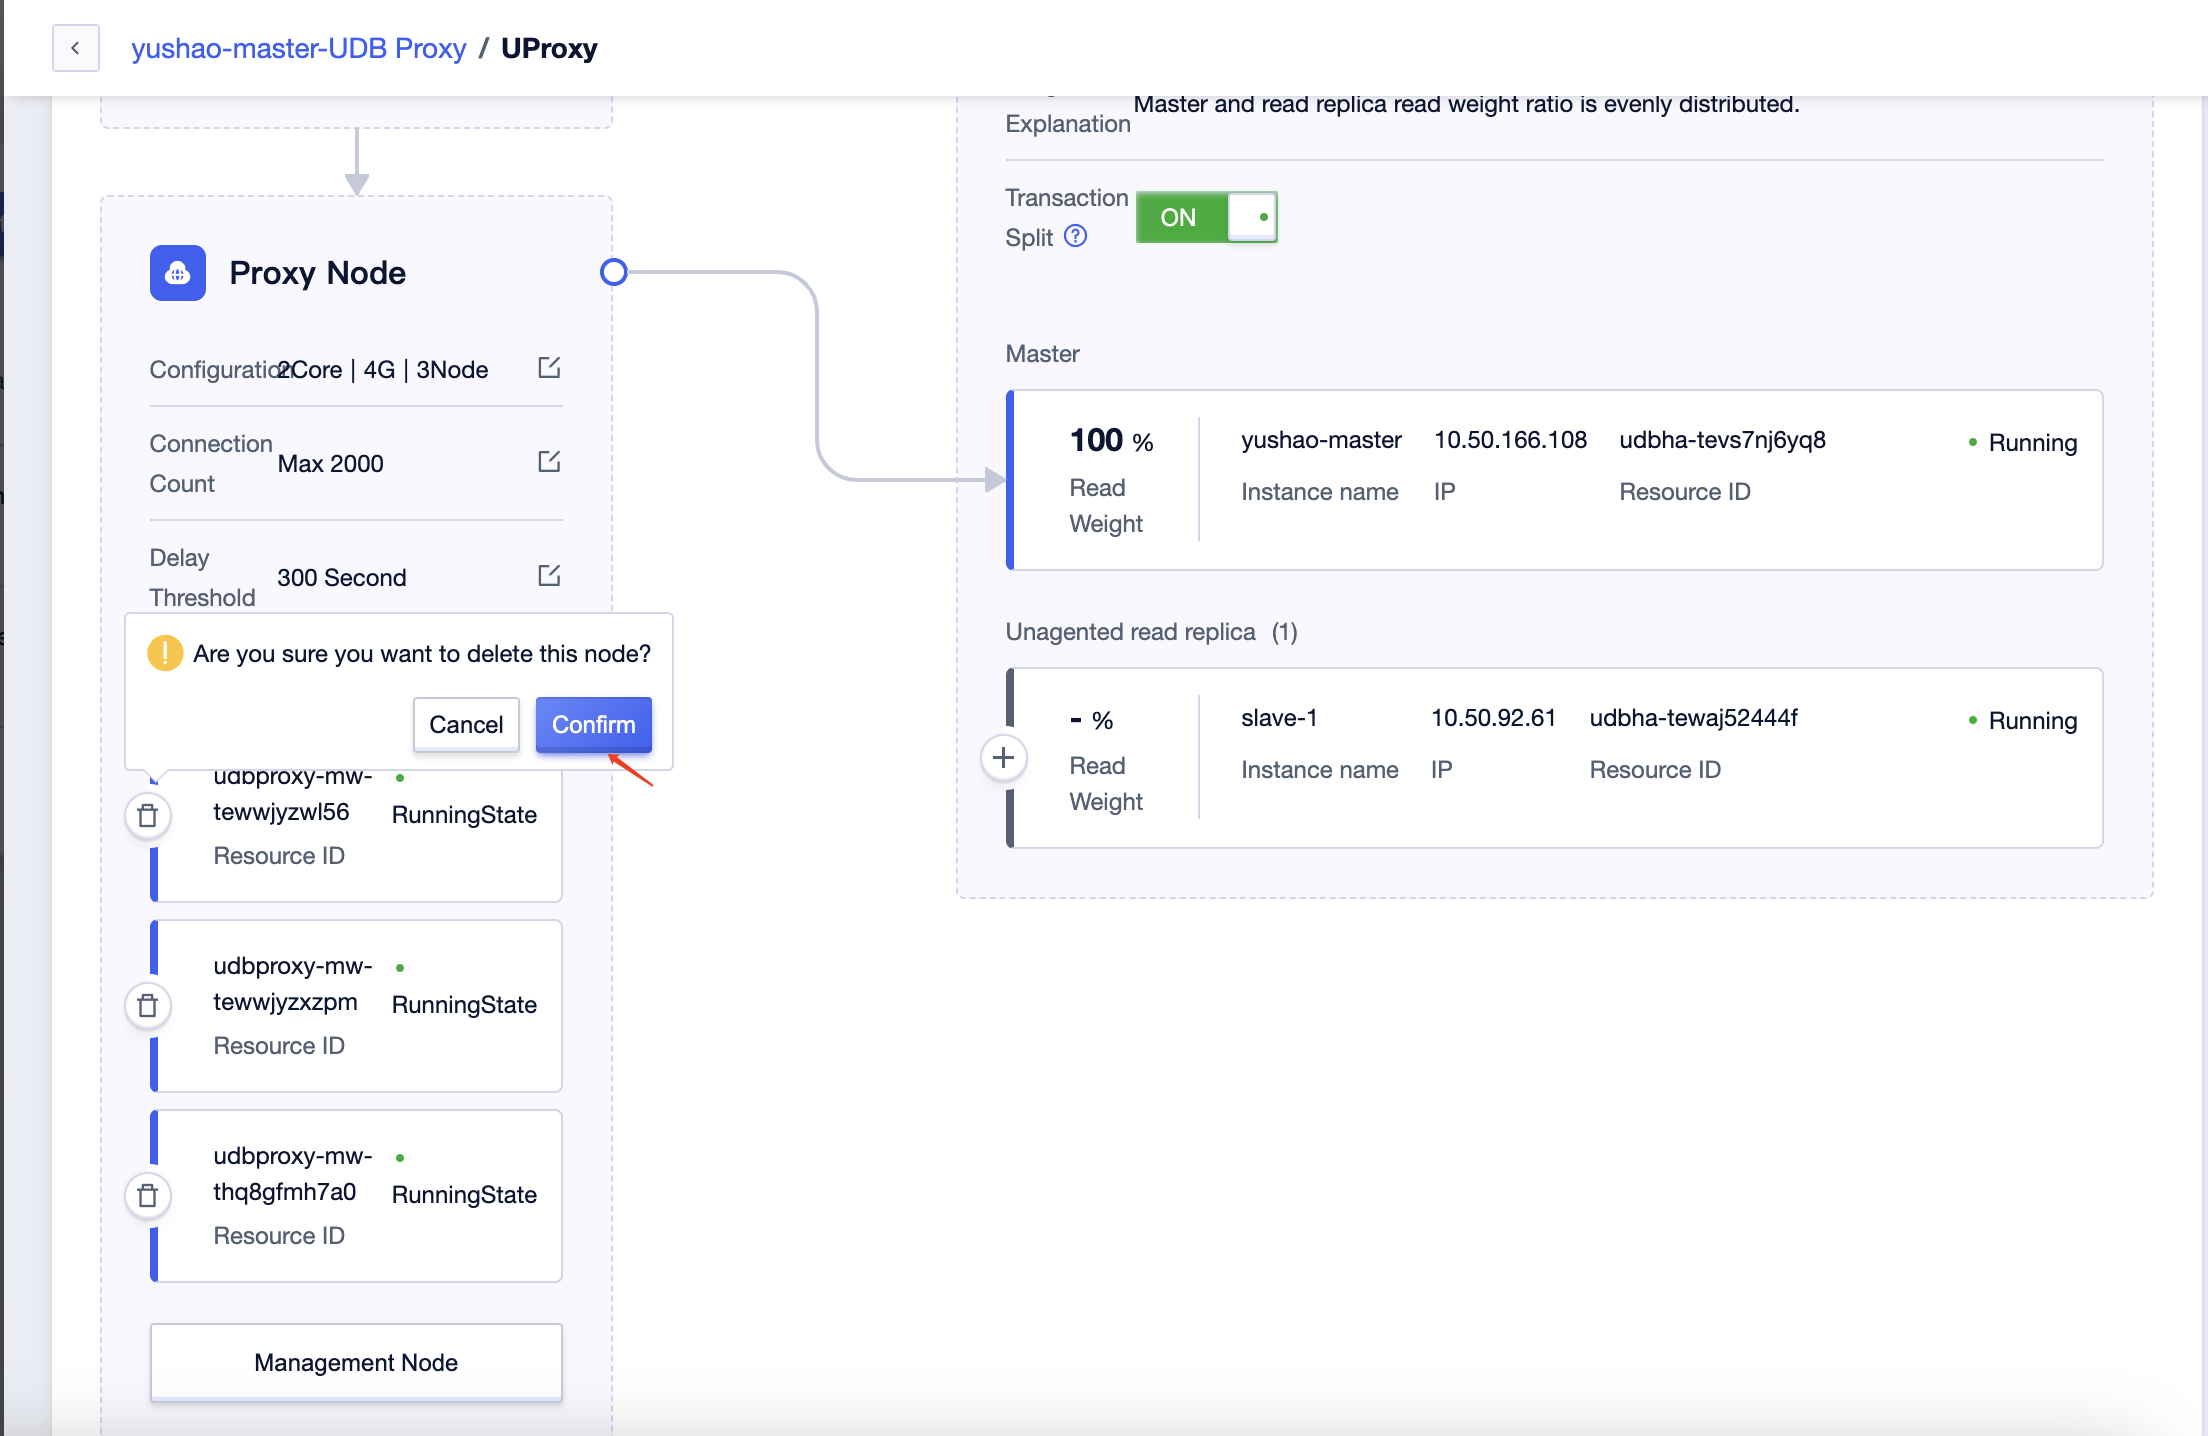
Click on the 'Delete' button on the left of the node to open the confirmation dialog for node deletion,
After clicking 'Confirm Delete,' the proxy node will enter the 'Deleting' state. After a period of time, the node will be deleted, and any related charges will be automatically refunded.