

Private Network VIP
Apply for Private Network VIP
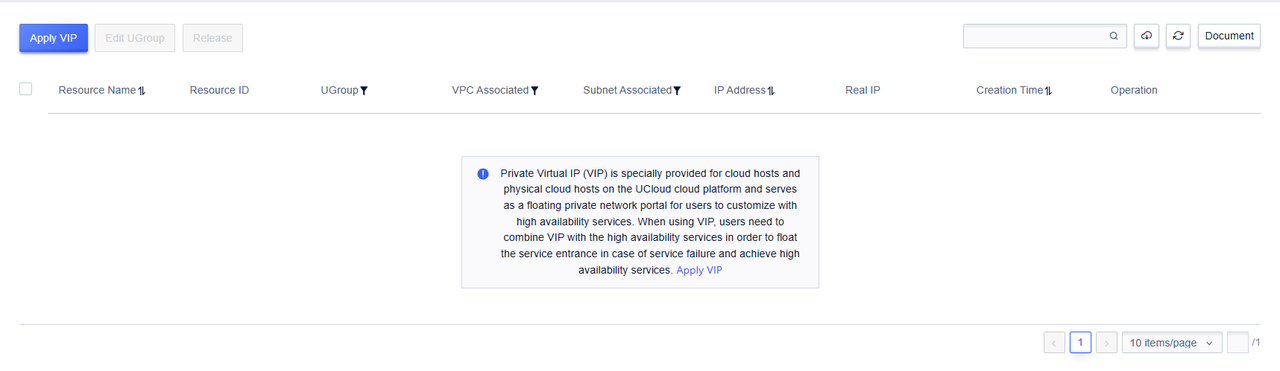
Select the 'Intranet VIP' option under the 'Network UNet' main tab in the selection menu to enter the main product page, and click the 'Apply for IP' button to apply.
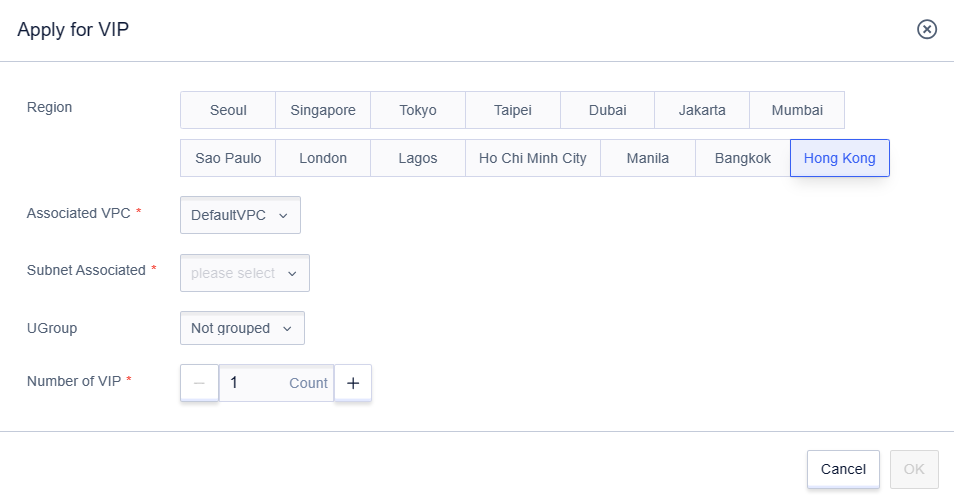
In the application menu, you can select the VPC and subnet to which the applied intranet VIP belongs, the business group, and the number of applications.
Note:
After the application is completed, you can click the "Edit" function on the list page to modify the name of the Intranet VIP, and you can also perform the "Change Business Group" operation on the Intranet VIP.
Apply the internal network VIP to the UHost
Note: A VIP can only be bound to one cloud host, otherwise it may cause inconsistency in ARP information.
Method one for CentOS system implementation:
Solidify the configuration, write the internal virtual IP into the ifcfg configuration file (effective for CentOS7 and lower versions)
- Copy an ifcfg-eth0 configuration file and rename it as ifcfg-eth0:0, the command is as follows
cp /etc/sysconfig/network-scripts/ifcfg-eth0 /etc/sysconfig/network-scripts/ifcfg-eth0:0- Modify the ifcfg-eth0:0 configuration file. The command is as follows
vim /etc/sysconfig/network-scripts/ifcfg-eth0:0After entering edit mode, change the IP after "IPADDR=" to the intranet virtual IP you applied for, change DEVICE="eth0" to DEVICE="eth0:0", and delete the line "GATEWAY=".
- Restart the network. The command is as follows:
service network restart- Use the arping command to announce arp information: If the virtual IP you applied for the internal network is 10.4.200.X
arping -U 10.4.200.XNote:
- After restarting the network, use the 'ip a' command to check if the intranet virtual IP has been added successfully.
- The intranet virtual IP can only be written into the ifcfg-eth0:0 configuration file, and the IPADDR in the ifcfg-eth0 configuration file should not be modified to the intranet virtual IP. If the ifcfg-eth0 configuration file is incorrectly modified, it may cause the network of the cloud host (UHost) to be interrupted.
For CentOS 8 and higher versions
Starting from CentOS 8, NetworkManager is fully used for network management, so the above method cannot be used for network management.
- Check the current connection status.
nmcli con showThe possible results are as follows:
NAME         UUID                                  TYPE      DEVICE
System eth0  5fb06bd0-0bb0-7ffb-45f1-d6edd65f3e03  ethernet  eth0
Get the current network connection name: System eth0
- Add IP
nmcli con mod "System eth0" +ipv4.addresses "192.168.0.30/24"- Load Configuration
nmcli con up "System eth0"- Use the arping command to announce arp information: If the internal virtual IP you applied for is 10.4.200.X
arping -I eth0 192.168.0.30
Method Two for CentOS System Implementation: Temporary Addition, Manually Add Intranet Virtual IP Using Commands
If the internal virtual IP you applied for is 10.4.200.X
The command is as follows
ip addr add 10.4.200.X/16 dev eth0Use the arping command to announce arp information
arping -U 10.4.200.XUse the 'ip a' command to check if the intranet virtual IP has been added successfully.
Note:
After the host restarts or the network service restarts, you need to manually re-add the internal virtual IP.
Method one for Ubuntu system implementation: Solidify the configuration by writing the internal virtual IP into the ifcfg configuration file.
Modify the network configuration file with the following command.
sudo vim /etc/network/interfacesDuplicate a section of the configuration file, replace eth0 with eth0:0, and fill in the intranet virtual IP obtained after the address.
# The primary network interface`
auto eth0`
iface eth0 inet static`
address 10.4.5.255`
netmask 255.255.0.0`
gateway 10.4.0.1`
dns-nameservers 10.255.255.1`
Example of Modified Configuration File in Ubuntu
# The primary network interface`
auto eth0`
iface eth0 inet static`
address 10.4.5.255`
netmask 255.255.0.0`
gateway 10.4.0.1`
dns-nameservers 10.255.255.1`
auto eth0:0`
iface eth0:0 inet static`
address Fill in the applied internal network virtual IP here`
netmask 255.255.0.0`
gateway 10.4.0.1`
dns-nameservers 10.255.255.1`
Restart the network, the command is as follows :
sudo /etc/init.d/networking restartAnnouncing arp information using the arping command :
arping -U 10.4.200.XUse the 'ip a' command to check if the intranet virtual IP has been added successfully
Special reminder:
The intranet virtual IP can only be added within the eth0:0 configuration segment, and the address in the eth0 configuration segment should not be modified. If the eth0 configuration segment is modified incorrectly, it may cause the network of the cloud host to be interrupted.
Method two for Ubuntu system implementation: Temporarily add, manually add the intranet virtual IP using the command
If the applied intranet virtual IP is 10.4.200.X, the command is as follows
ip addr add 10.4.200.X/16 dev eth0Using the arping command to announce arp information :
arping -U 10.4.200.XUse the 'ip a' command to check if the intranet virtual IP has been added successfully.
Special reminder:
After the host restarts or the network service restarts, you need to manually add the intranet virtual IP again.
Unbind the configured intranet virtual IP in resources
The situation where the CentOS system writes the internal network virtual IP into the ifcfg-eth0:0 configuration file
Delete the ifcfg-eth0:0 configuration file, the command is as follows
rm /etc/sysconfig/network-scripts/ifcfg-eth0:0Restart the network, the command is as follows
service network restartUse the 'ip a' command to check if the intranet virtual IP has been successfully deleted.
In the case of manually adding an intranet virtual IP using a command in the CentOS system, if the applied intranet virtual IP is 10.4.200.X, the command is as follows
ip addr del 10.4.200.X/16 dev eth0Use the 'ip a' command to check if the intranet virtual IP has been deleted successfully.
The case of Ubuntu system writing the internal network virtual IP into the configuration file
Modify the network configuration file, the command is as follows
sudo vim /etc/network/interfacesDelete the configuration section auto eth0:0 in the configuration file. Example of the configuration section to be deleted in the Ubuntu configuration file:
auto eth0:0`
iface eth0:0 inet static`
address This should be the intranet virtual IP you applied for`
netmask 255.255.0.0`
gateway 10.4.0.1`
dns-nameservers 10.255.255.1`
Restart the network, the command is as follows
sudo /etc/init.d/networking restartUse the 'ip a' command to check if the internal virtual IP has been deleted successfully.
The situation where the Ubuntu system writes the internal virtual IP into the configuration file
If the requested intranet virtual IP is 10.4.200.X, the command is as follows
ip addr del 10.4.200.X/16 dev eth0Use the 'ip a' command to check if the internal virtual IP has been successfully deleted.
Release VIP
On the Intranet VIP function page, select the Intranet Virtual IP that needs to be released, and click "Release" in the function buttons.

In the pop-up dialog box for releasing the virtual IP, the related information of the intranet virtual IP is displayed. After confirming that it is correct, click "OK" to complete the release of the intranet virtual IP.